
Phoenix Mosaic Project
I first started with a quick pencil drawing, but wanted to start the vector design on computer from scratch so only used the drawing for reference by my side.
Started my favourite vector based program up, and my weapon of choice is Illustrator.
A blank screen without any tracing reference on screen is quite daunting but a nice challenge and as soon as you get creating and start to see the design come together it all gets more a little more easier.
A little bit differently then normal, I am creating some of the main shapes with the pen tool and then simple copy and paste and change the size of the shapes. As its vector lines I can copy and paste shapes and change the sizes, stretch out bigger feather type shapes and its all easily edited if needed.
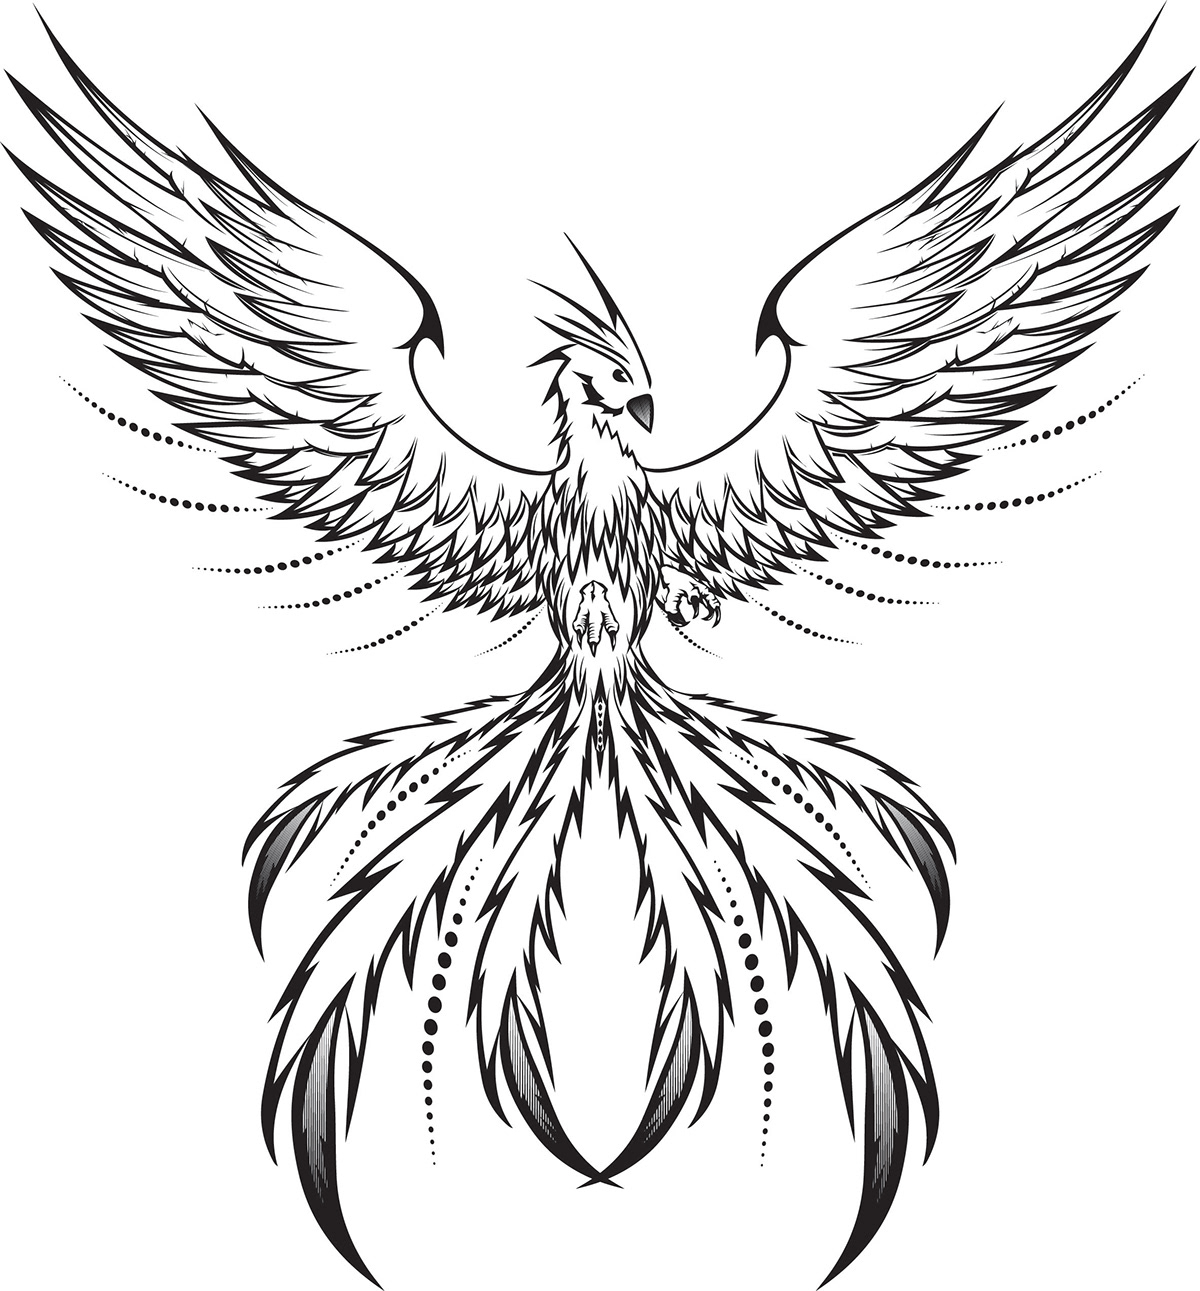
As you can see from the image below I start to develop a large range of shapes and all I do is start to place them together to start to get the main shape of the design. The lines you see are not closed, but are exactly the same as all the individual shapes on the page.
I knew I wanted the design symmetrical, so for the wings and tail only half of each part was needed and I just duplicated and flipped to create the other side. One thing I love about working digitally is easy short-cut moves like that can save time.

The head and the body were the difficult areas of this design. Getting the correct proportions and look just took its time. I found that one feather shape slightly out of place made the complete design look terrible.
As you can see I didn't like the head and wanted something a bit more angular and pointy. A slight change and the design came together nicely.
A print out of the design to give to the client and feedback followed with no change apart from a sun behind. Now is the time to start thinking more about a design which would look great as a mosaic. The sun is a great idea to give contrast to the main phoenix.

I take the vector image into my second choice of computer program – Photoshop, and mock-up a quick reference on what it might look like with added circle elements.

I have the design, now the craft part comes next. I am not a mosaic expert but, like any design thinker, I do my research and a day later I am familiar with the creative process and details of mosaic design.
The wood panel was bigger then expected and knew the proportions were wrong to fill the entire wooded board. No problem as the mosaic would be big enough if I up-scaled to the width of the board and preserved the correct proportions.
As were slightly modifying the correct technique in creating a mosaic (design onto board and not printed on paper), we have a few different ways to get the design onto the backing board.
First I was going to use a projector to display the image onto the board and draw it on. With this reference it would be quick and easy.

I wanted the challenge of drawing it directly using the A4 sheet as reference and to follow the correct proportions and scaling as much as possible.
As the final image is going to be a mosaic the drawing will not matter if its millimetres in accuracy but I wanted to exercise my drawing skills while working on this project, so I took more time then normal. What I mean by more time then normal is that I measured and prepared the board by drawing a grid first. This will be a good reference and help me scale the drawing with the correct proportions as I start to copy my design from the A4 sheet. I grid the A4 sheet as well and using a tiny bit of math, I get a nice 12 square by 11 square grid on both the board and the reference sheet.
I know this is not necessary but I had time and wanted to use this method; more because I have never used this method in a real life situation other then studying about the technique.

Preparations done it was time to grab the HB pencil and start. Like any design the more it starts to look like something the easier it is to draw without reference, or maybe that’s just me. I tried to draw one side first so I could use the reference from one side to the other, after all most of the design is symmetrical.


I can tell you, drawing on wood will kill your pencil. I have never had a HB run out before, but this image took a lot of sharpening the pencil.
Oh yes, plenty of sharpening going on...

My next weapon of choice was the full graphite 4B pencil. This made the lines darker and made it easier to see the design. I recommend any designer to step away and have a break now and again from their work, as its amazing what mistakes you can see when looking at it fresh. Also looking at your design from an upside down position can point out mistakes and proportion errors more clearly.

Looking at the design after the first 6 hours of work I can see a few symmetrical errors. I will correct them near the end.

For creating the circle sun I use the old 'blue wool and a nail banged in with the end of a screwdriver and a pencil on the end' technique.

Also I used tracing paper to trace one of the tail shapes to get the correct symmetry. I only used this on the last tail shape to get it perfect.

The outline of the design is done and seems to be as perfect as it needs to be for a mosaic guideline.

Next I want to get the board set up with the correct cut lines. I measure and mark so that a 60mm wooden border all the way round can be added and that the excess be cut off.
I am leaving a smaller area where more mosaic can be added.

I mock-up some sheets with the design on so the group of people that are going to complete the design can try some colours out. Also some photographic examples of mosaics which they should try to follow in terms of ceramic size and placement.

To give my client/s more of an idea of what it may look like I create a quick mock-up on Photoshop with the 4 colour ceramics they already have. Red, orange, yellow and black are the colour ceramics which they already have so I use these.
Photoshop has a great range of filters in the filter gallery, one including 'mosaic tiles'. Although I found that using the 'stained glass' filter gave better looking results. This will change the image like below and after you can just select the border colour and deleted it. This will create mosaic looking shapes and the background colour can be layered behind to show through.


The design below will give them something to go by when working on the mosaic.


