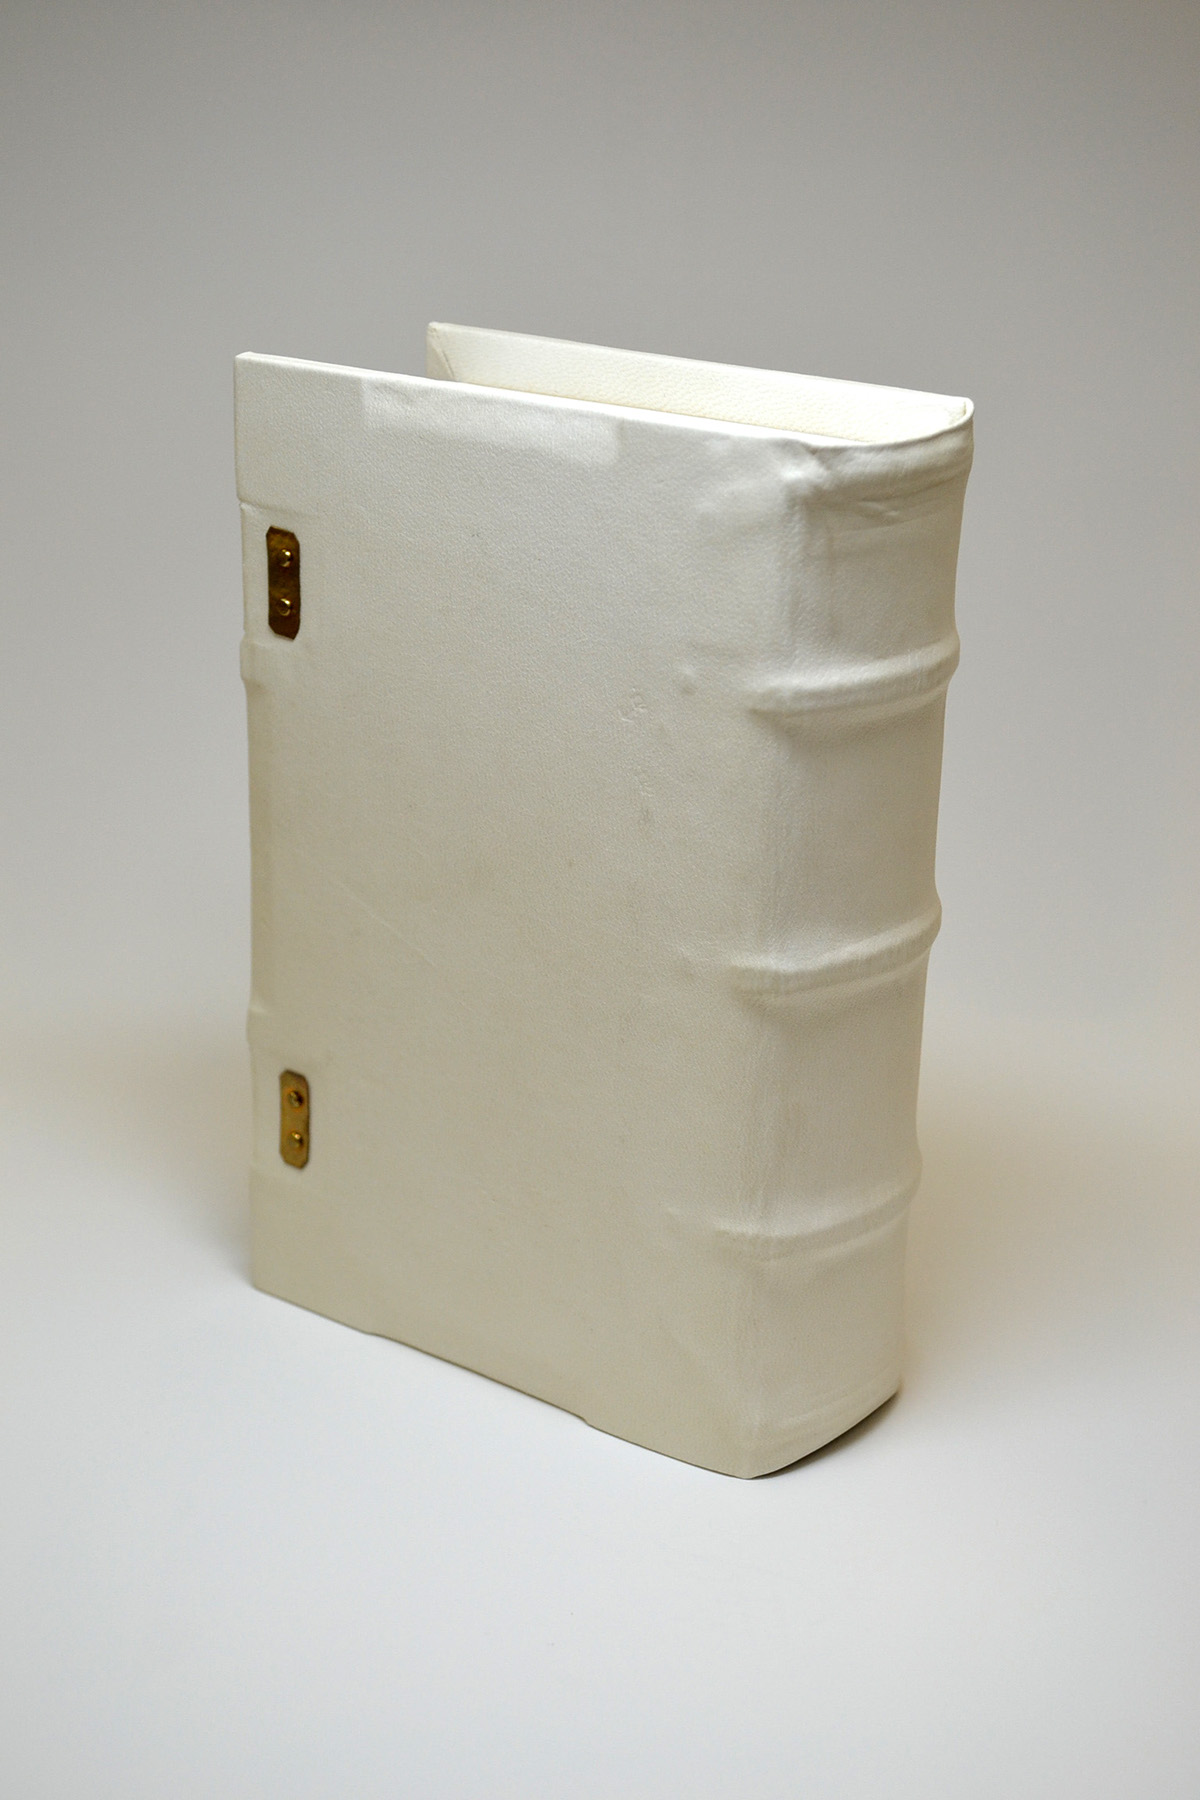
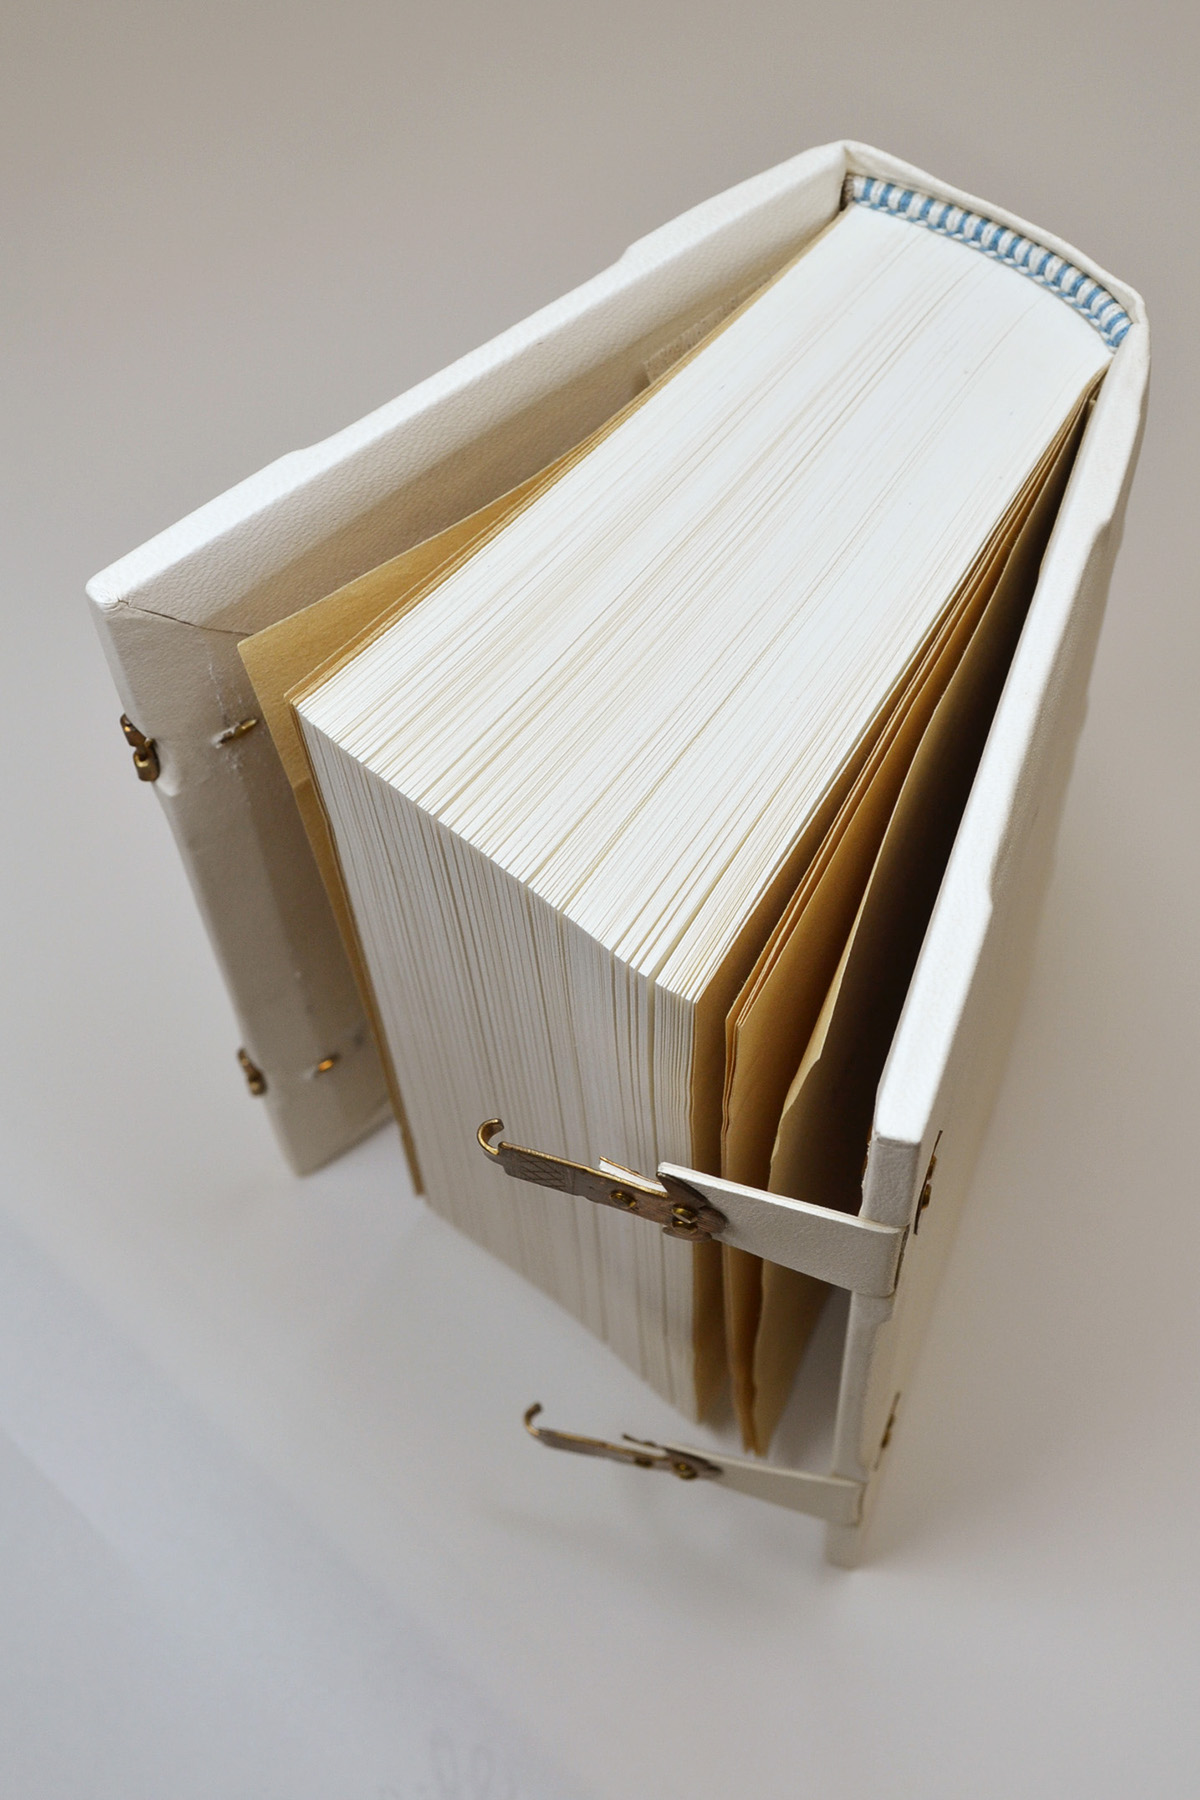
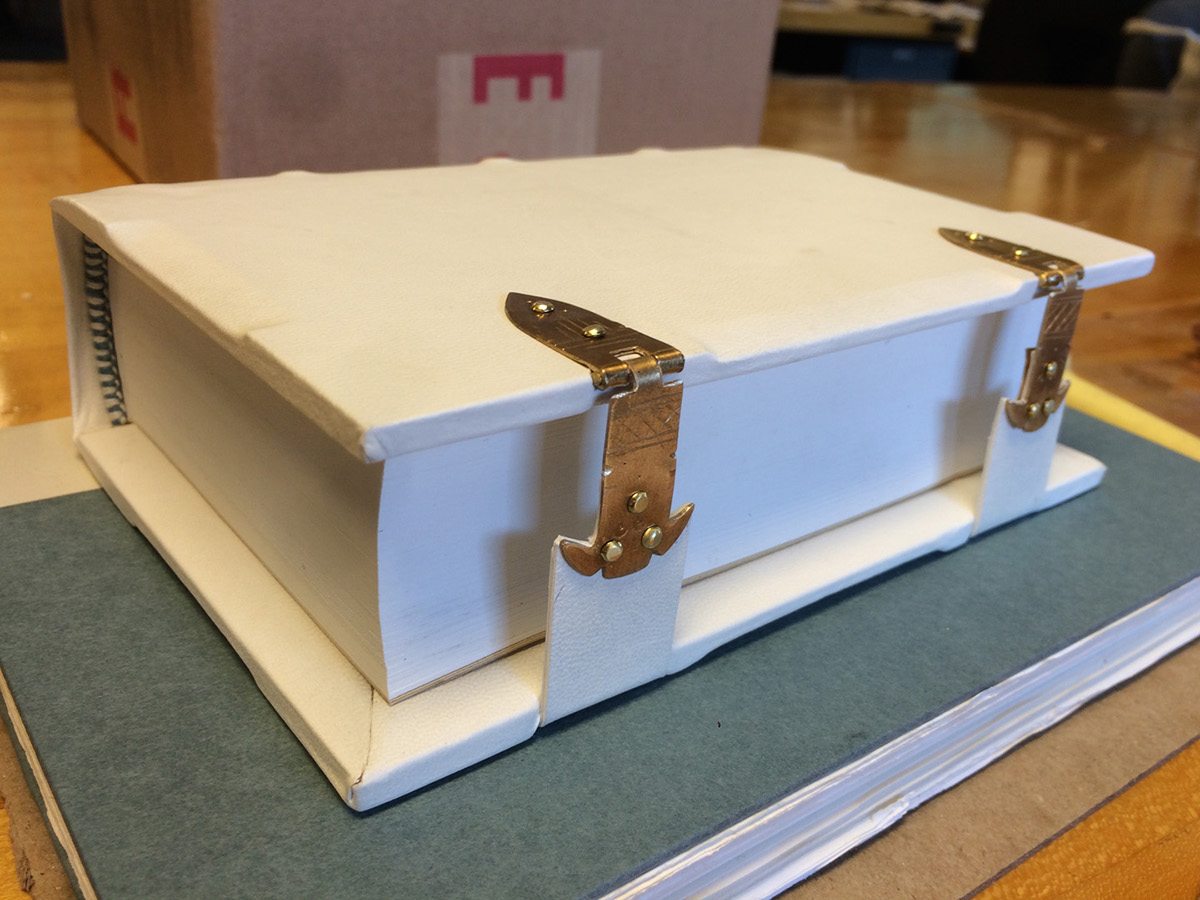
16th Century German Gothic Bookbinding Model
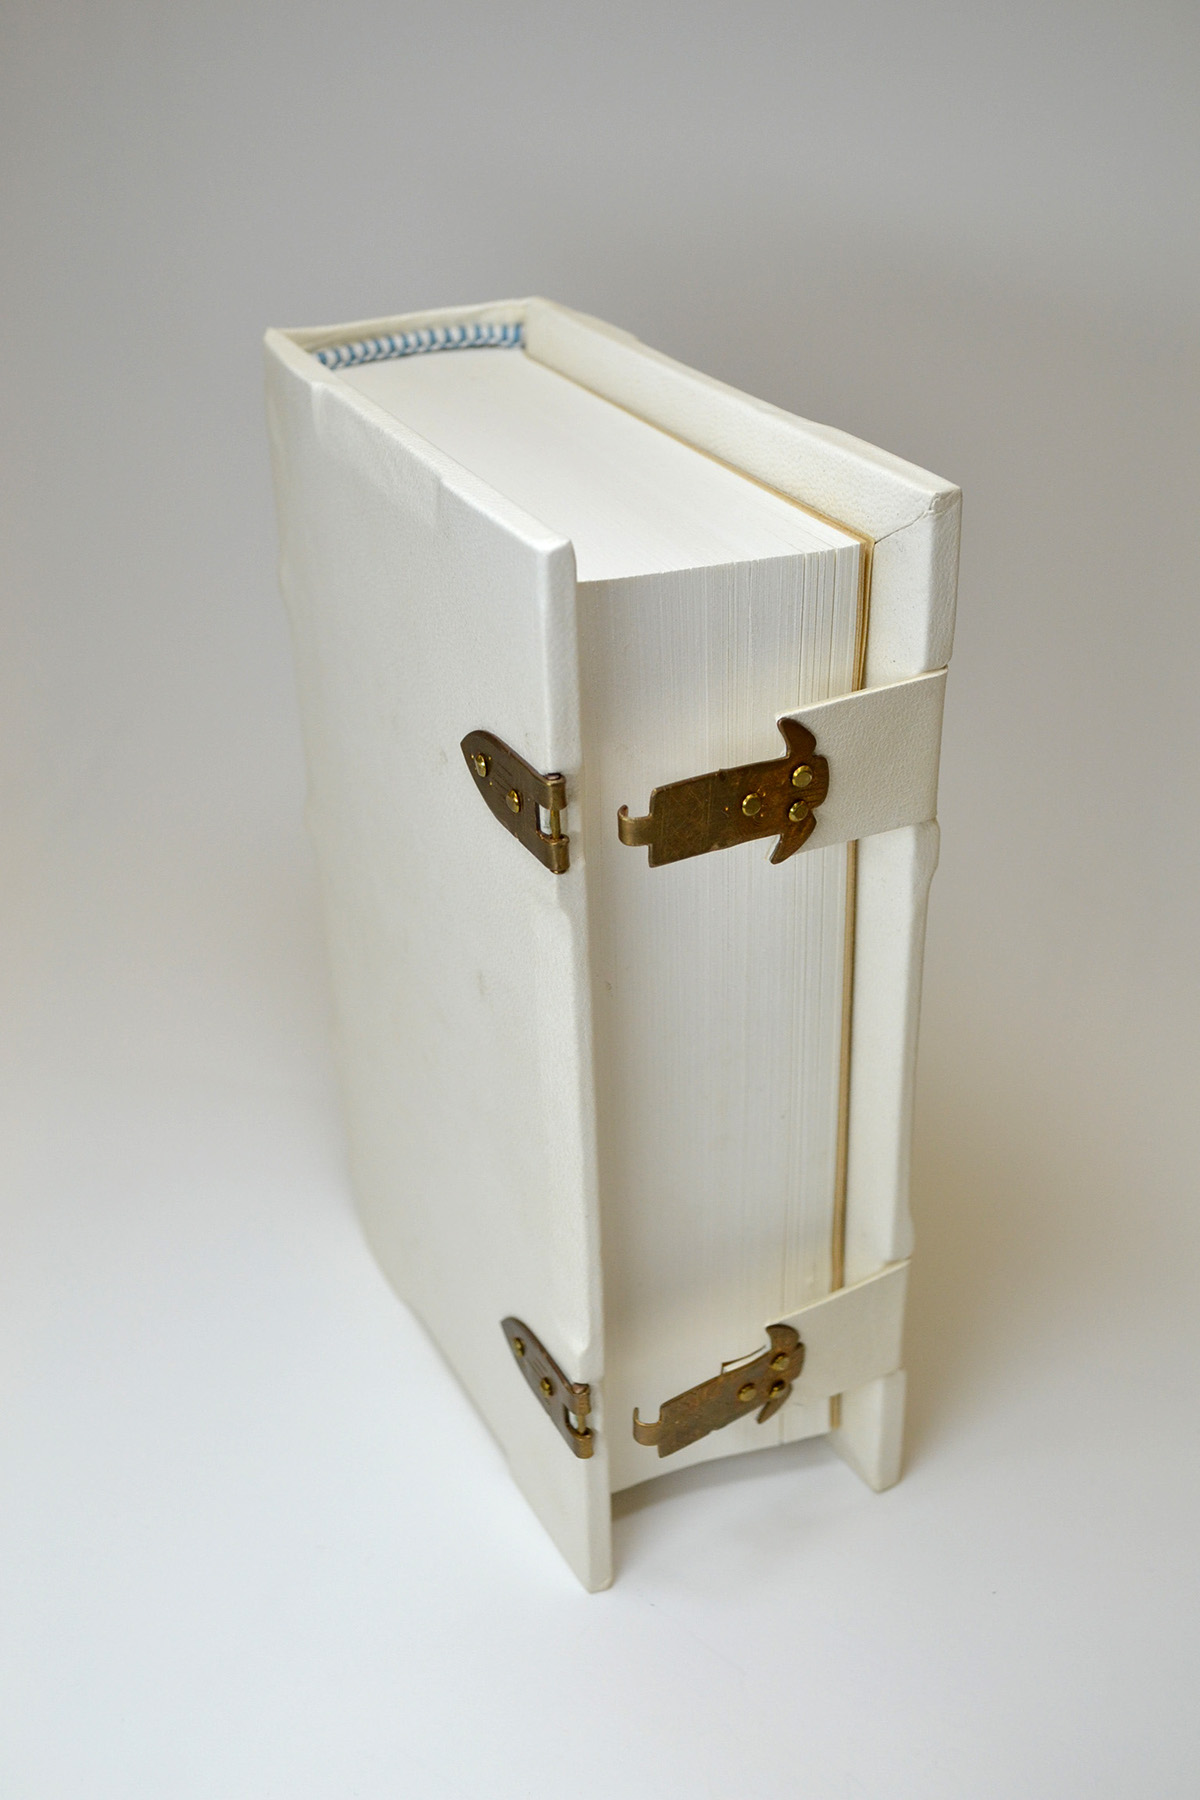
Made during the 2015 Historic Book Structures for Conservators Workshop, which was taught by Jeffrey Peachey at the Winterthur Museum conservation studios. In the 1500's these books were usually bound in white alum-tawed pigskin, and over centuries of use the leather eventually turns a light yellow or brown. This style of binding was commonly used in 16th century Germany, and they are easily recognized today by their blue and white endbands, bronze clasps, shaped beechwood boards and blind-tooled (embossed) leather, which often features geometric elements, botanical motifs and small portraits of religious figures. These 500 year-old books are extremely sturdy and are made of high-quality materials, meaning that they are often in far better shape than more modern books.

The Making of the Model:
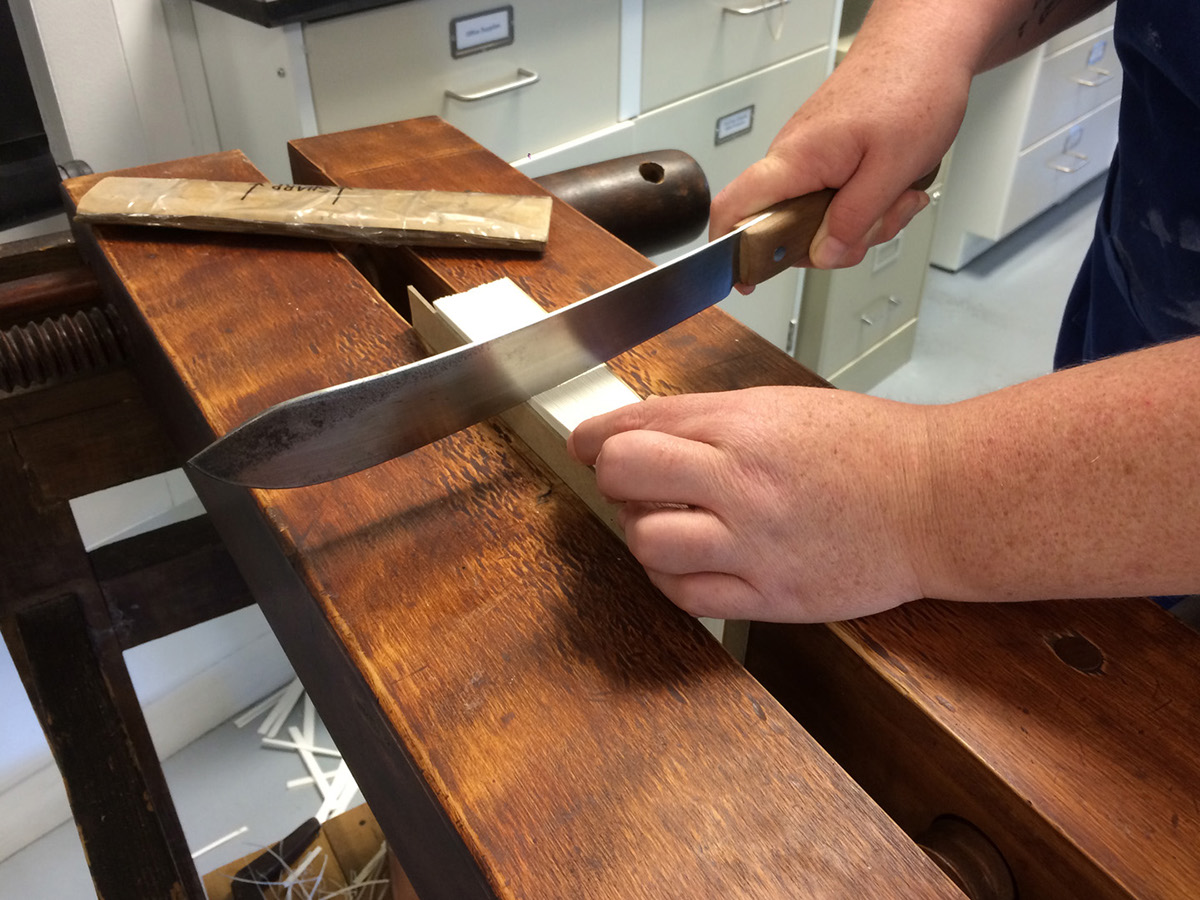
Before the folded quires are sewn together, deep grooves must be cut into the spine with a long knife: below, a fellow student is demonstrating the process with a facsimile of a 16th century German bookbinder's knife.
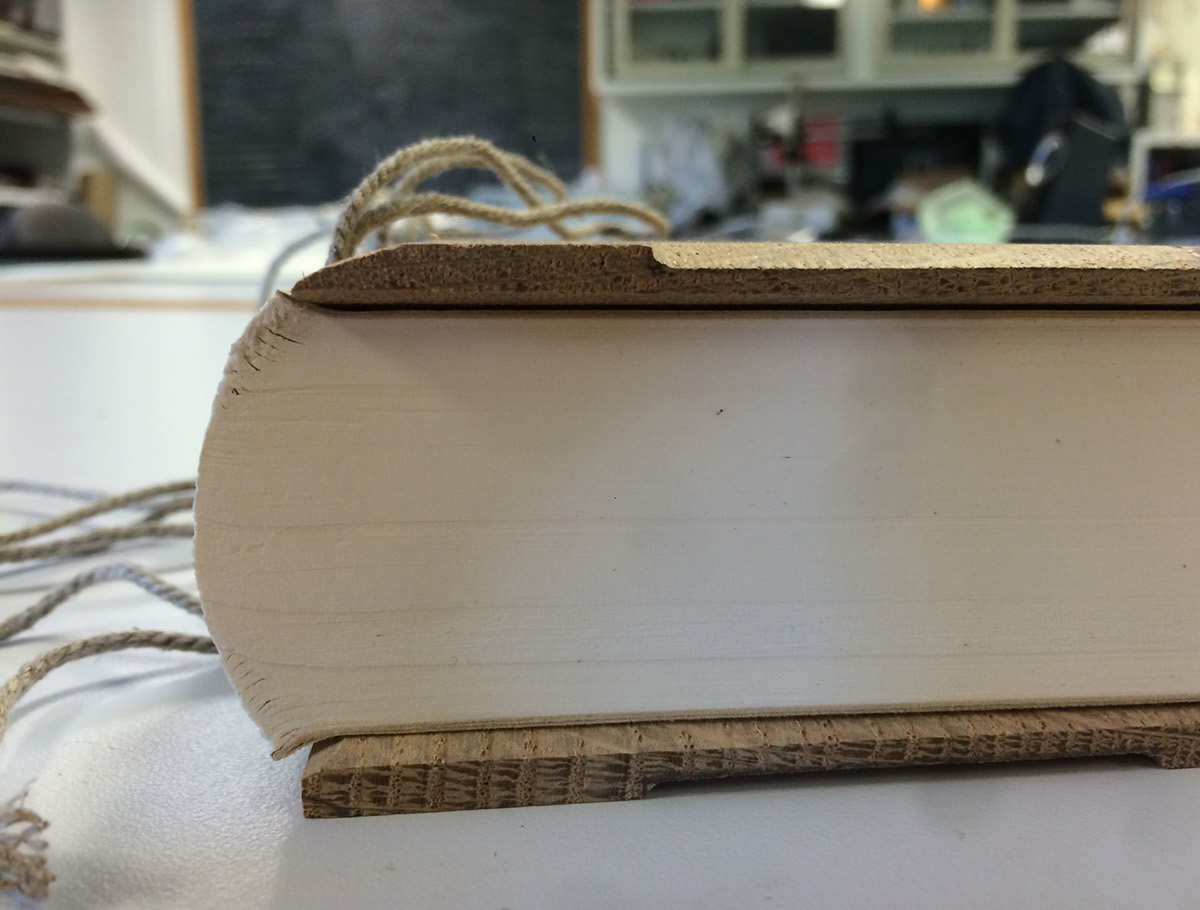
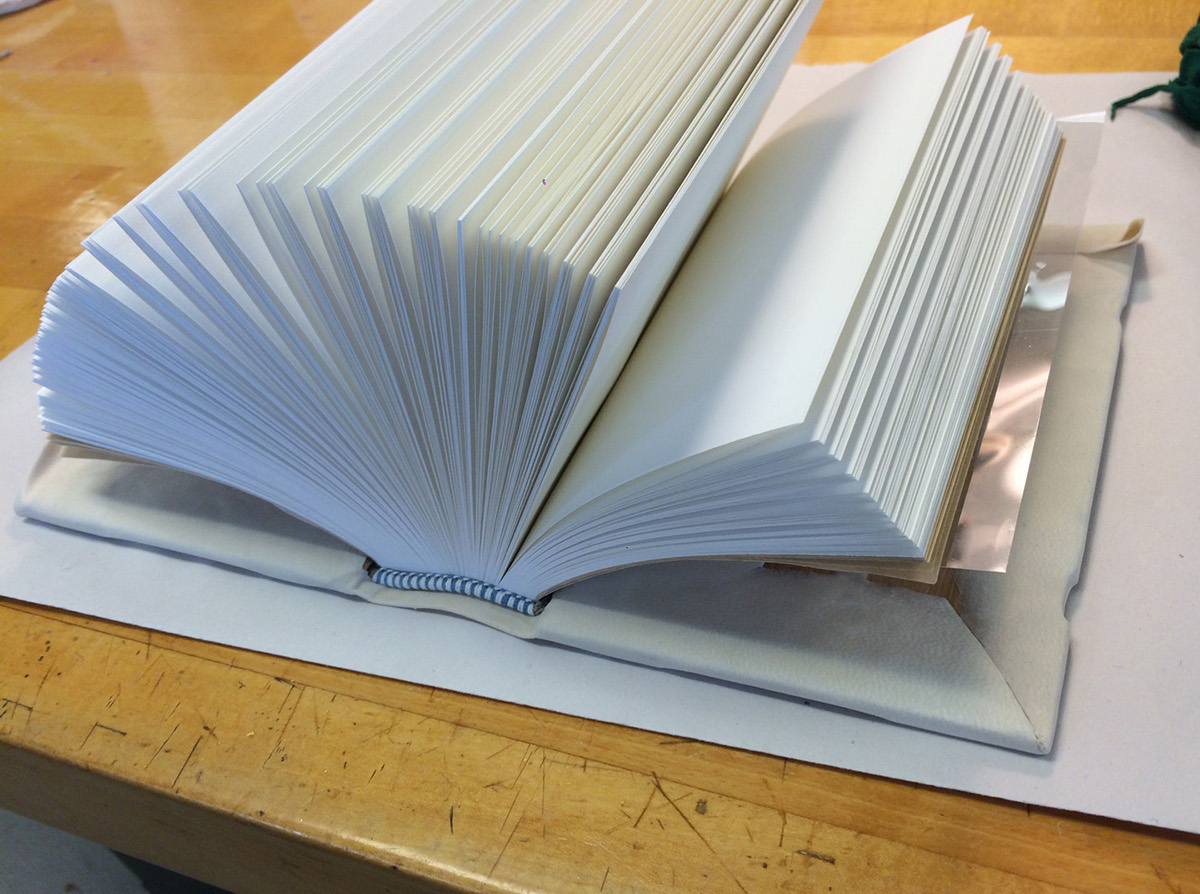
Below, the grooves which were cut into the spine can be more clearly seen. These grooves will guide the needle during the sewing process, to ensure that the book's sections are sewn together neatly. The text blocks of these books were generally very thick, made even more so by the heavy beechwood boards which protect the text:

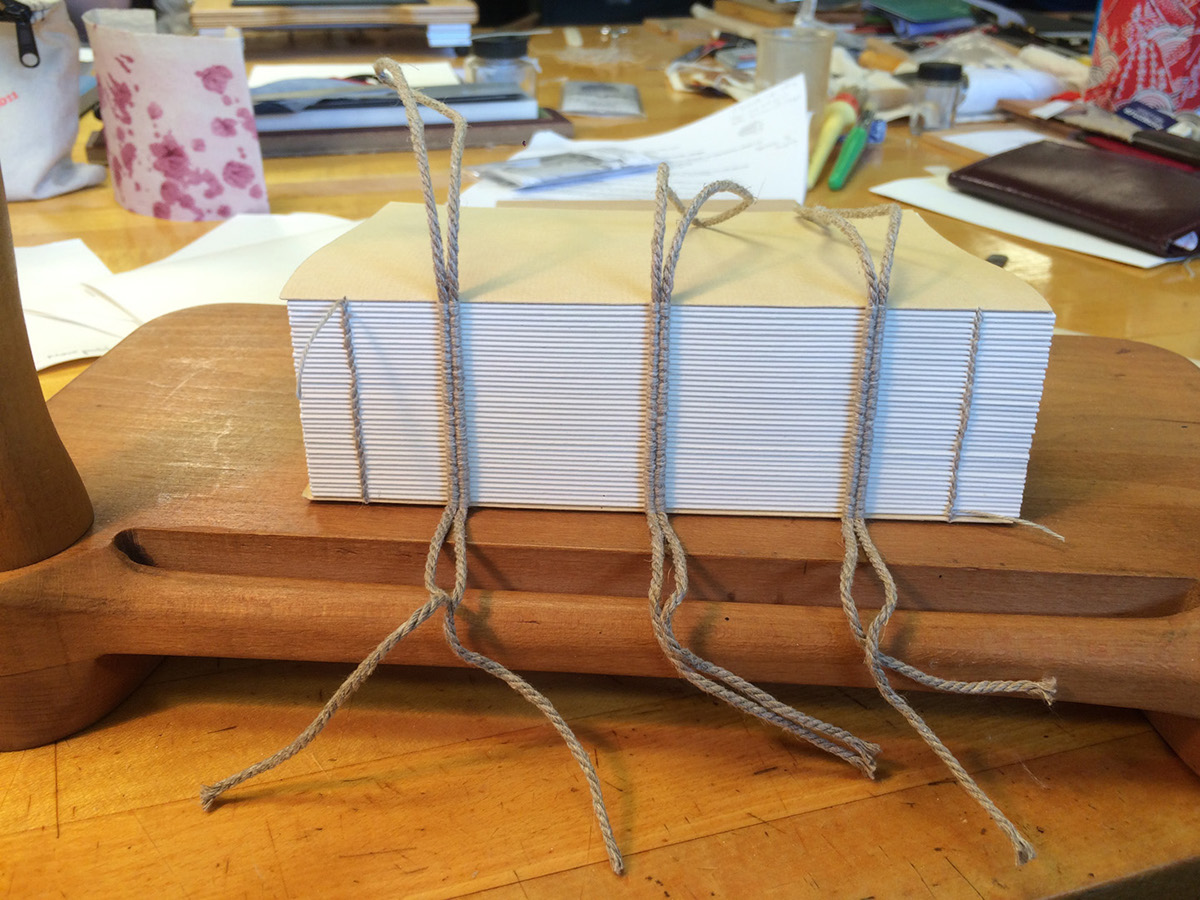
Sewing the textblock is extremely time-consuming for unpracticed hands, especially because the book is sewn on double cords. The thread must make a figure-eight around the cords at every sewing station, giving the spine more strength and flexibility.

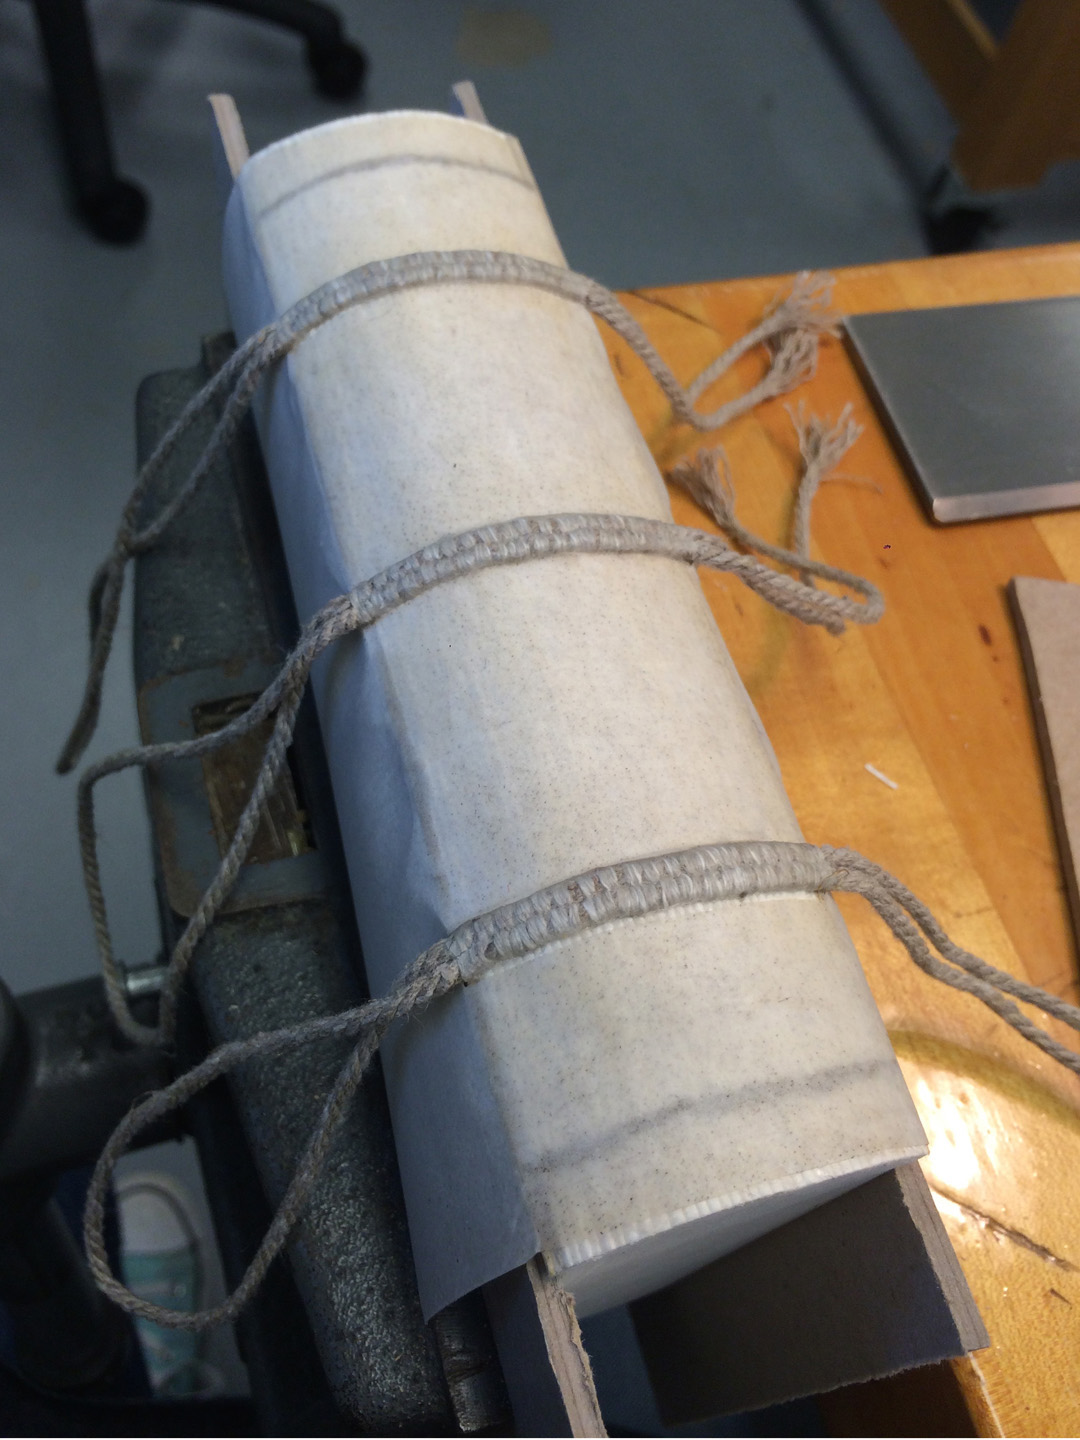
After more than an hour, the book is sewn together. The trailing ends of the double cords will eventually be laced into the wood boards, securing them firmly to the text block.
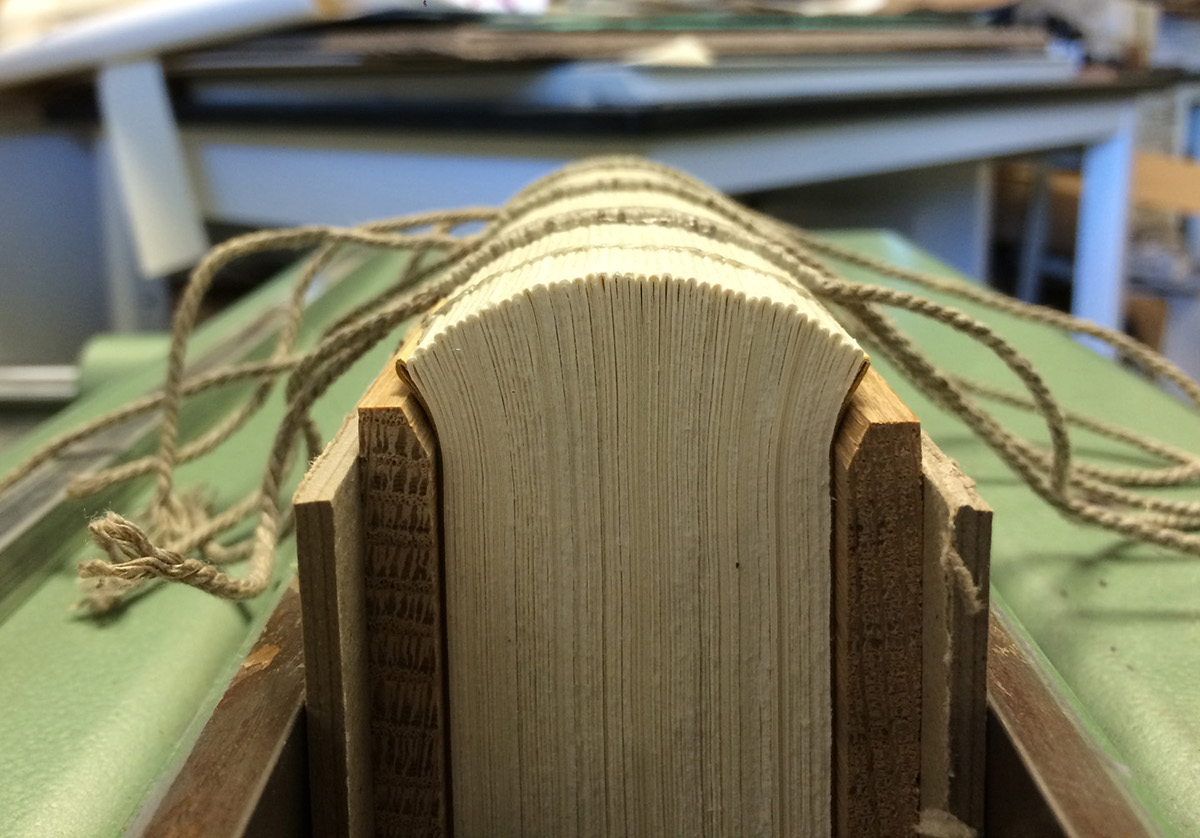
Next, the spine is rounded and given many layers of wheat starch paste to hold its shape:

The wooden boards have been beveled slightly to accommodate the bulge of the spine. The boards will be shaped more extensively at a later stage.
The textblock is put into a press and cut down or "ploughed" with a blade, trimming away any excess paper and giving a smooth edge to the textblock. This is a slow process, because only 1-2 sheets are cut away with every pass of the knife.

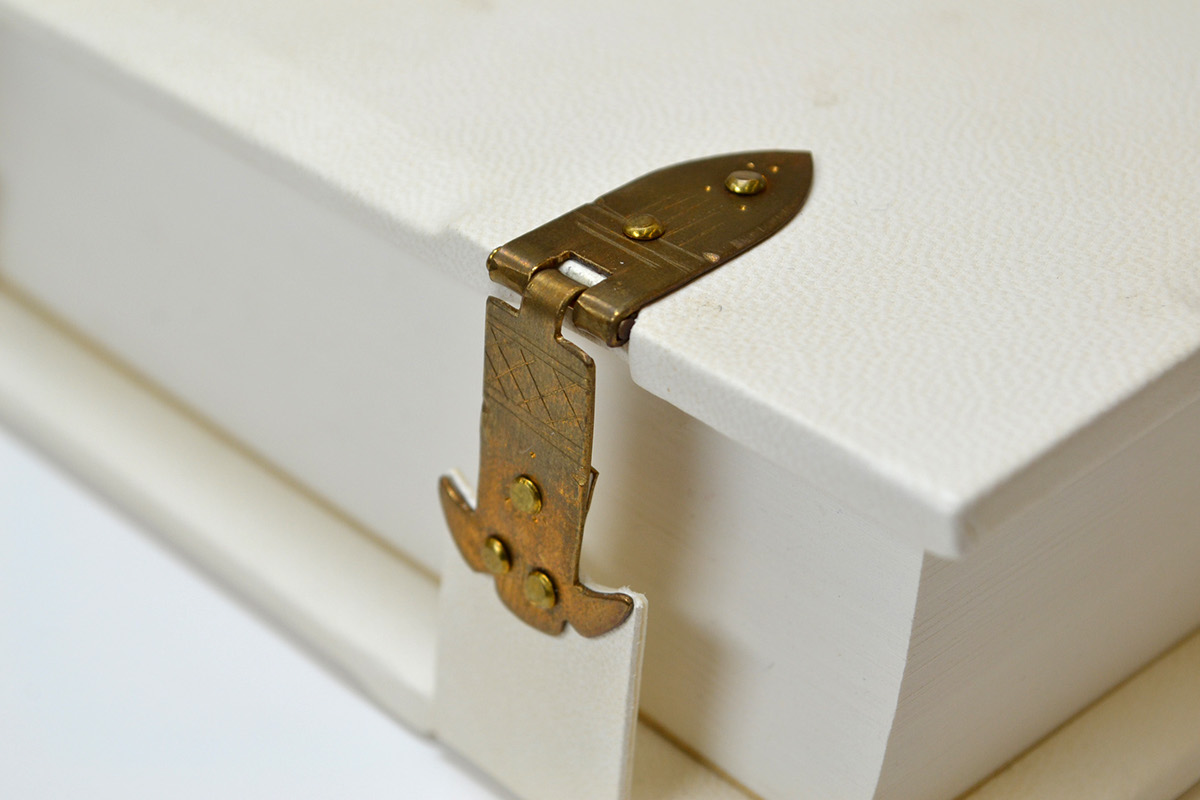
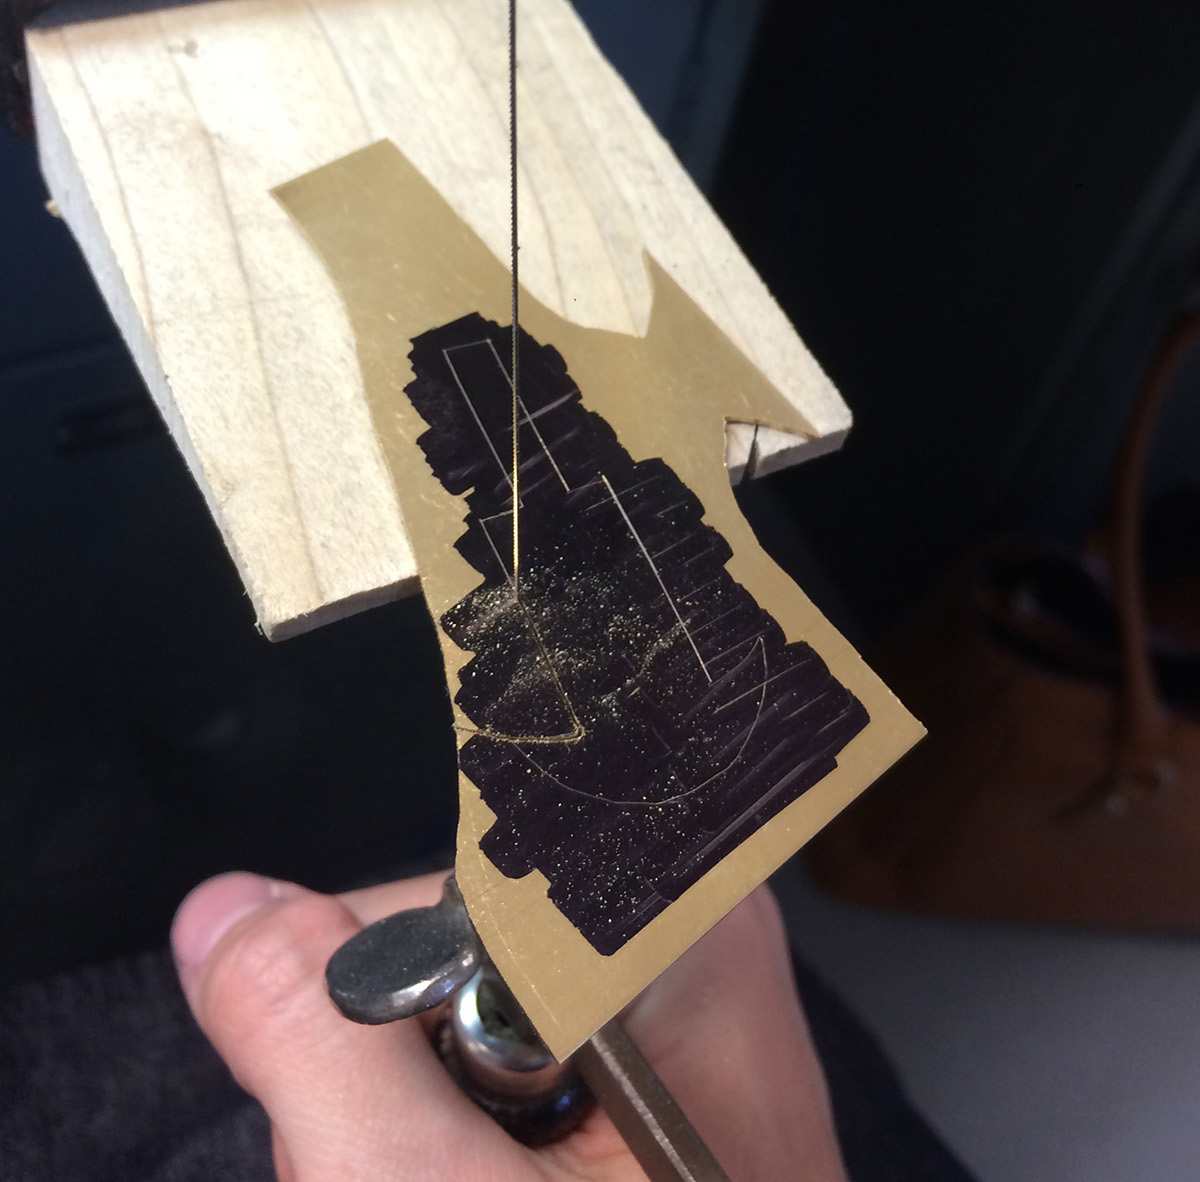
Between the various steps, there is time to work on the book's bronze clasps. The rough shape of each clasp is first cut out of a piece of sheet metal:
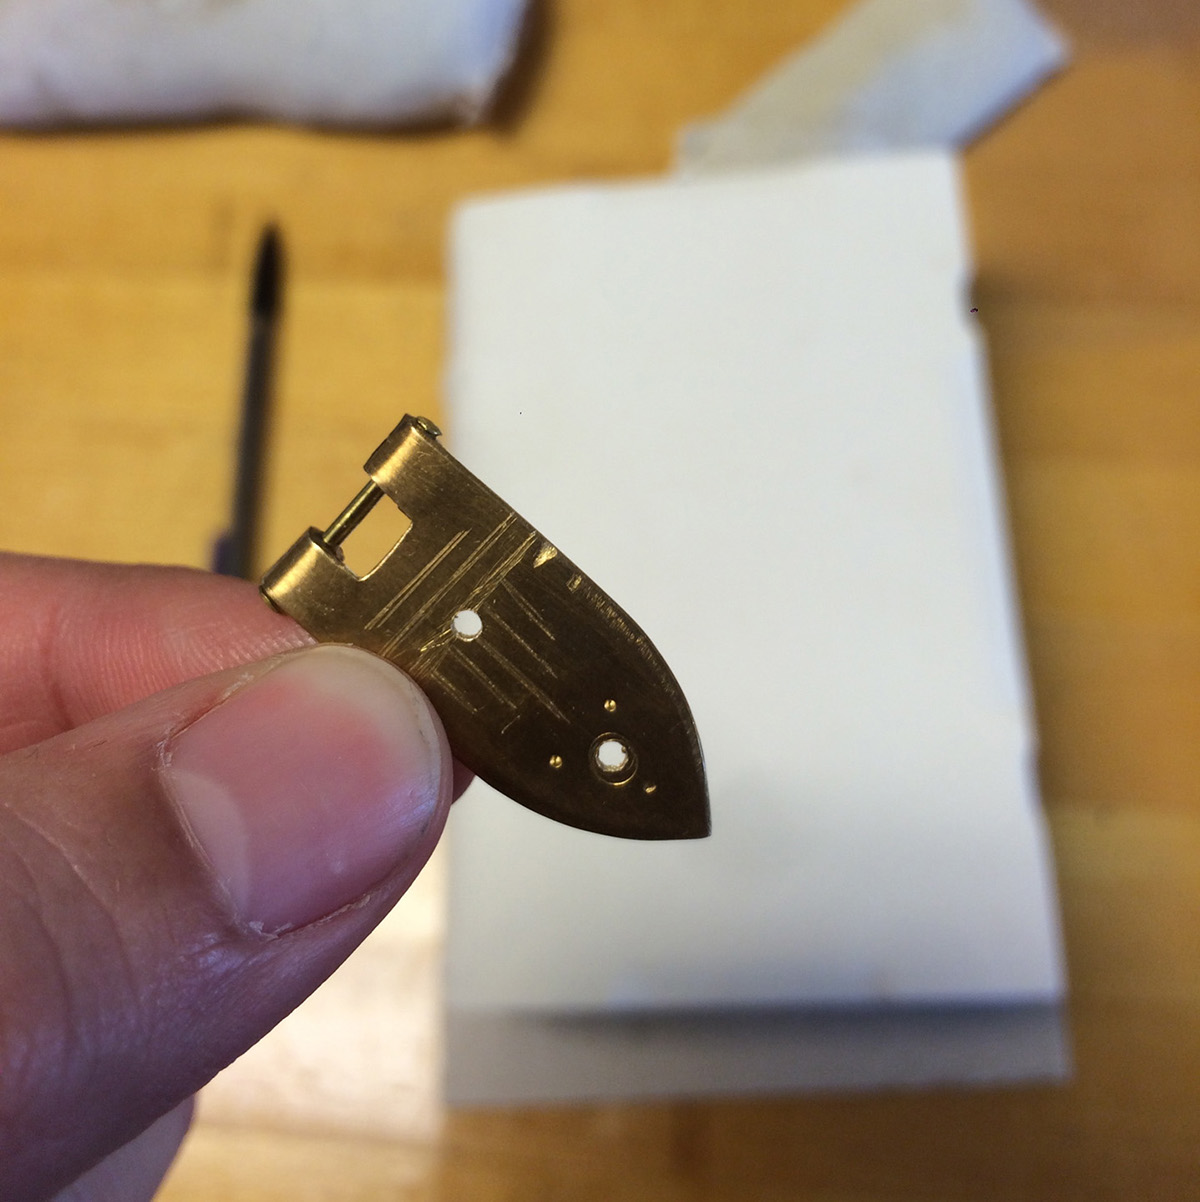
Later the clasp is shaped, filed smooth, drilled and embellished:

Below is the "catch-plate" which the clasp locks into, and this piece will eventually will be attached directly to the book's upper wooden board:
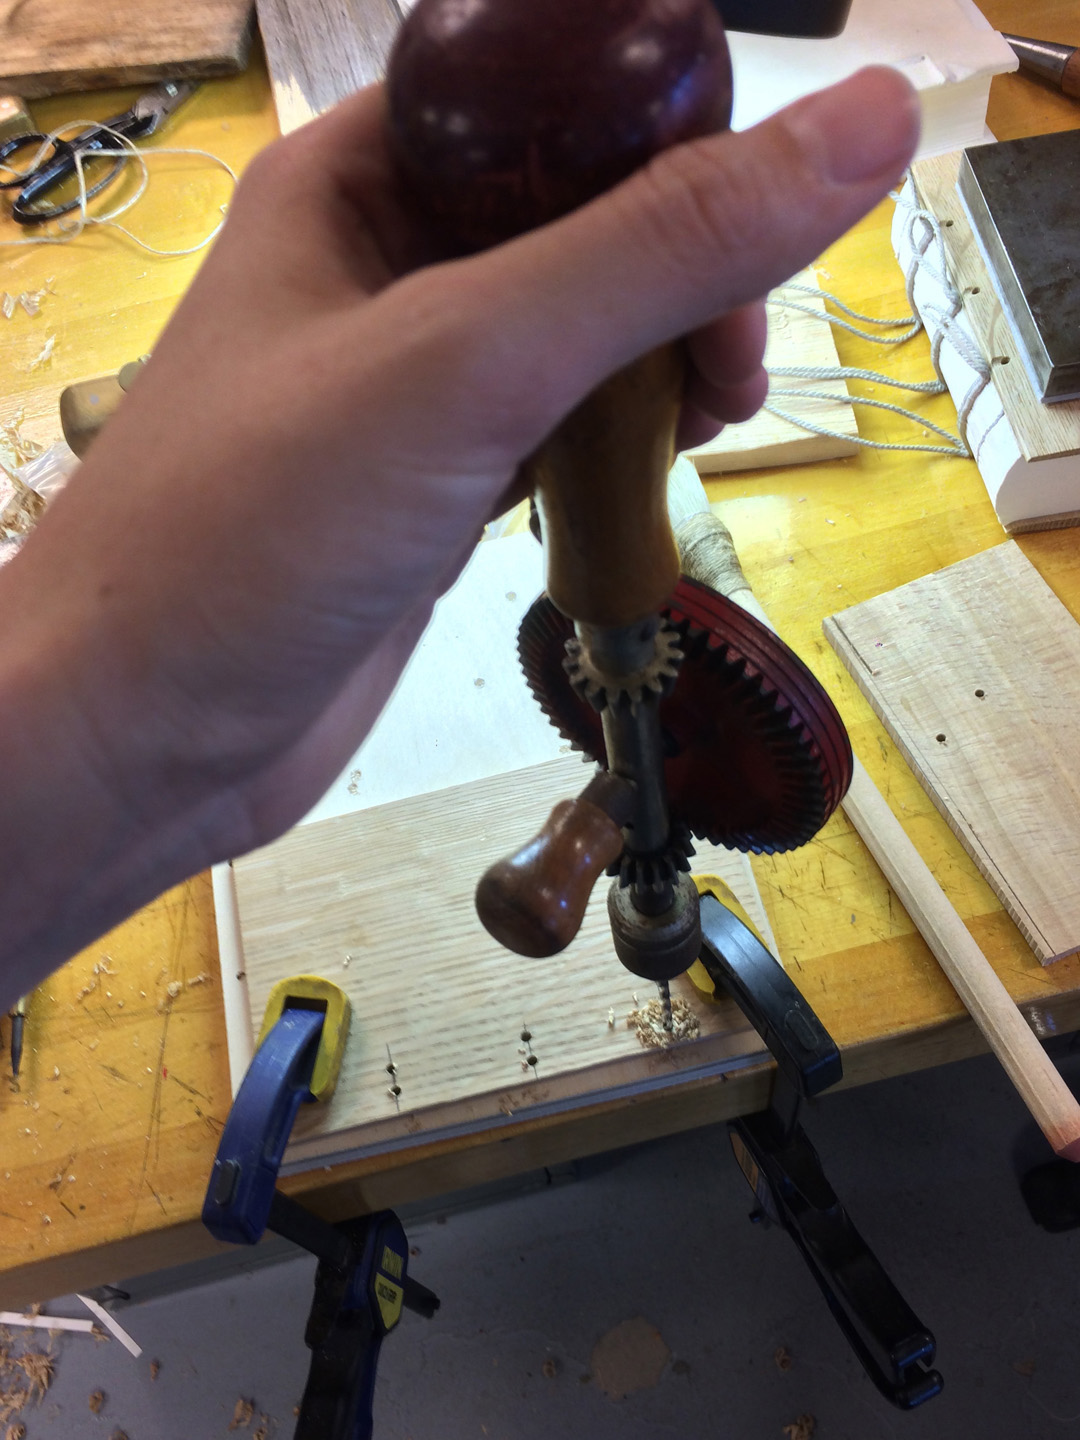
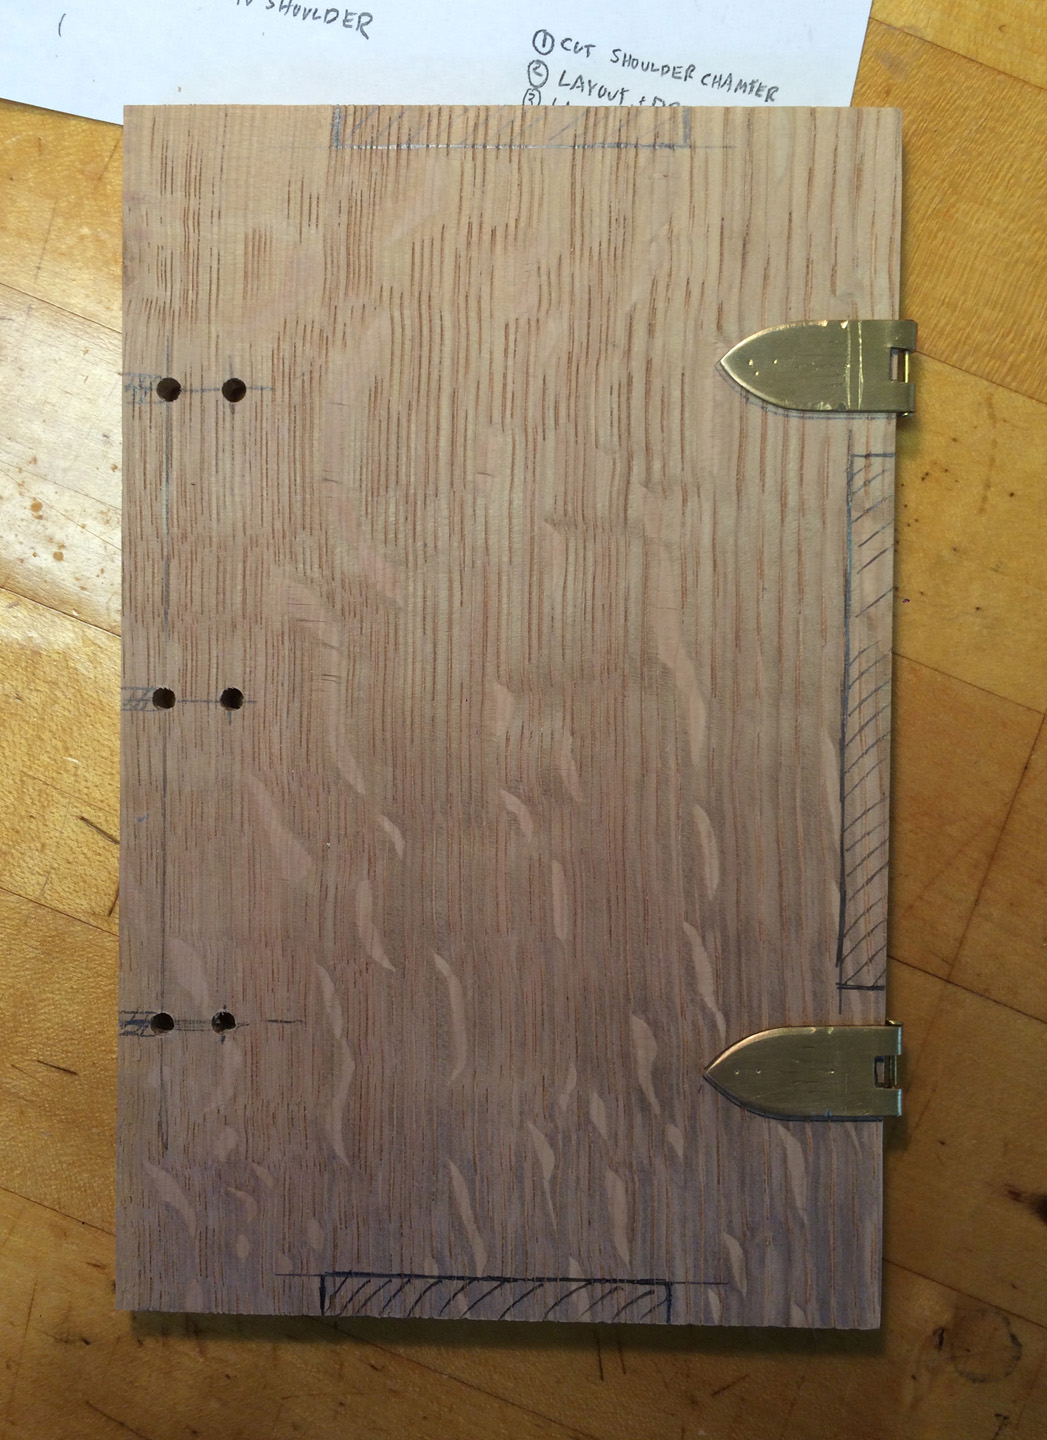
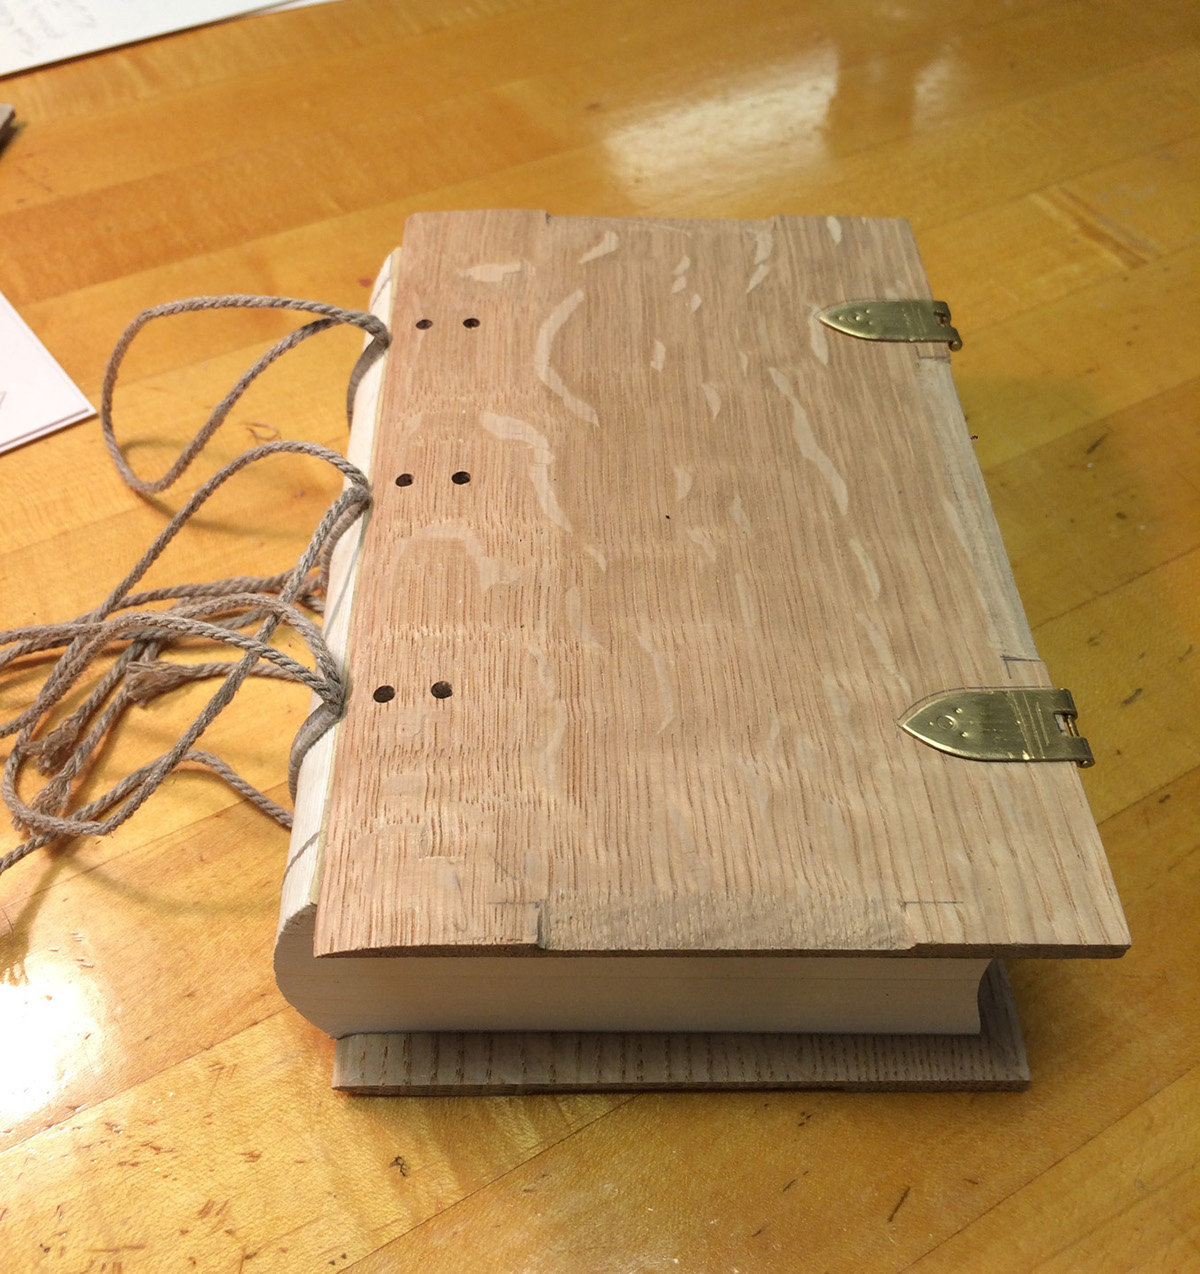
Before the boards are shaped any further, six holes are drilled into each one. The double cords of the book's spine will be laced into these holes, and this will securely attach the boards to the textblock.
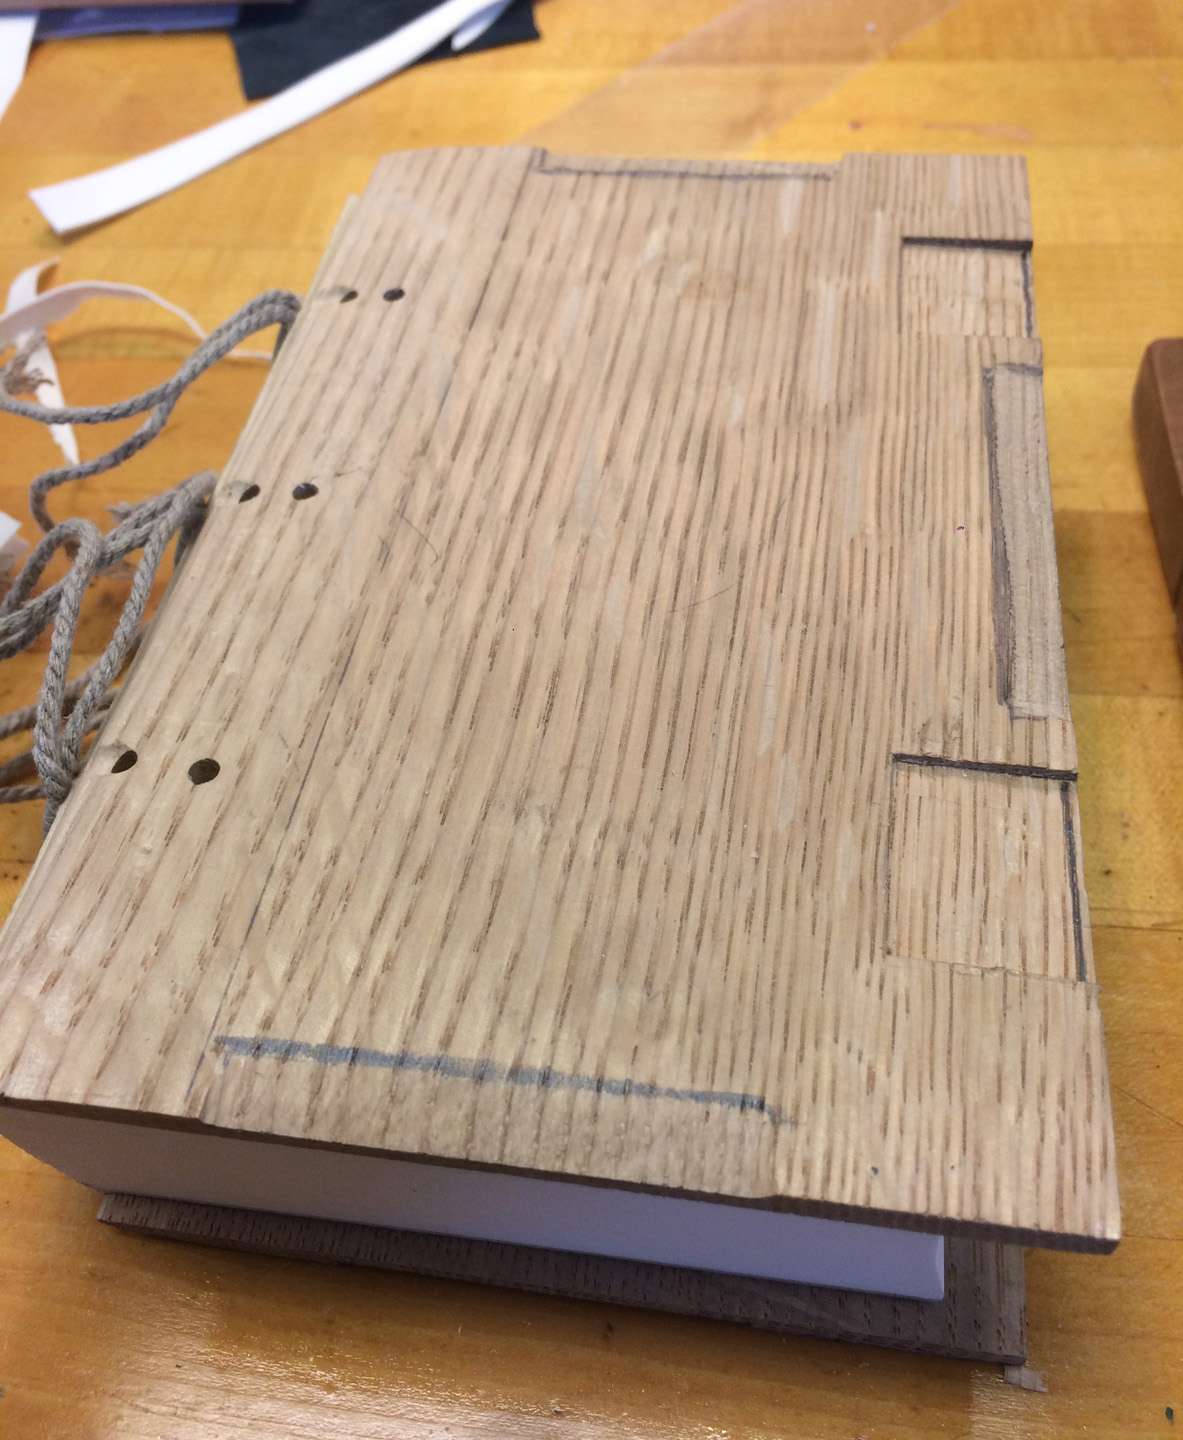
Next, the shaping of the boards is planned out in pencil:
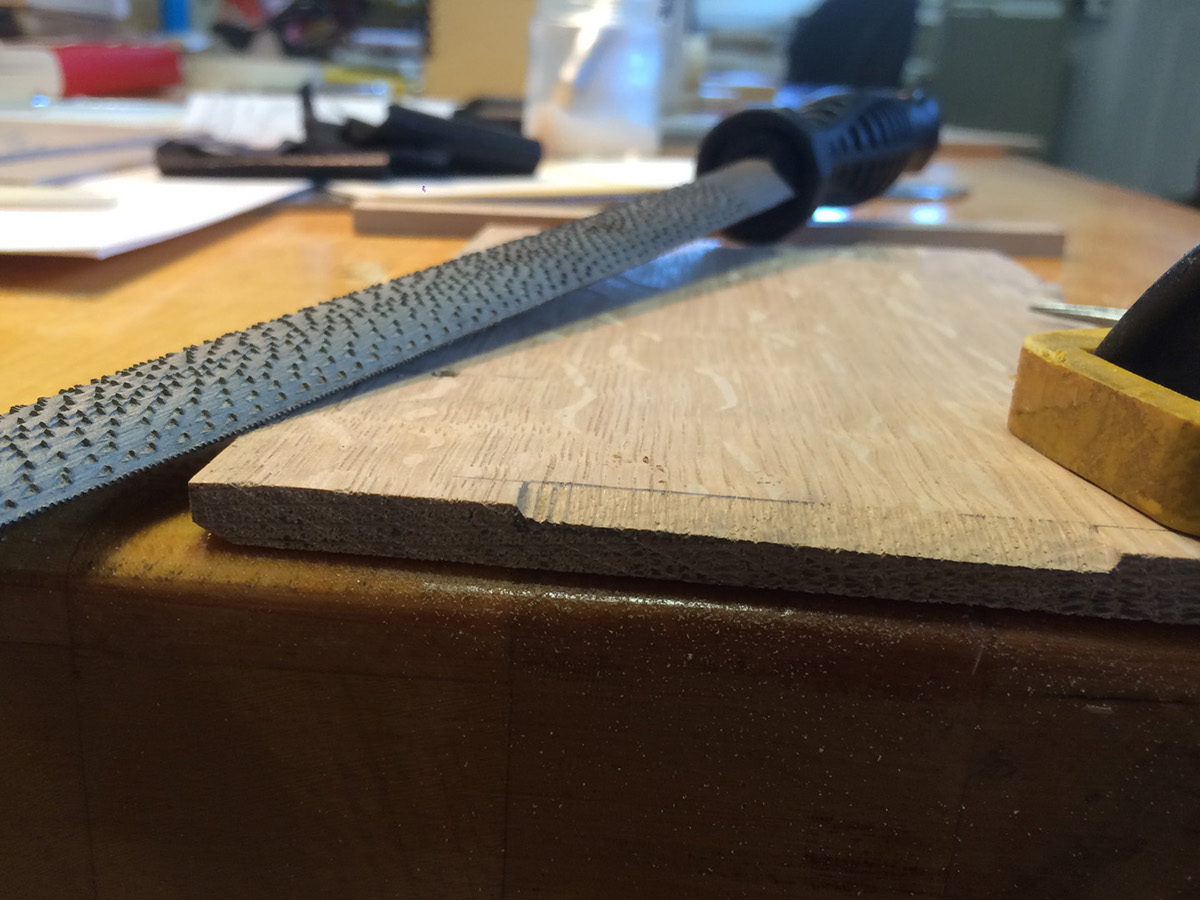
The edges of the boards are roughly shaped with a rasp:
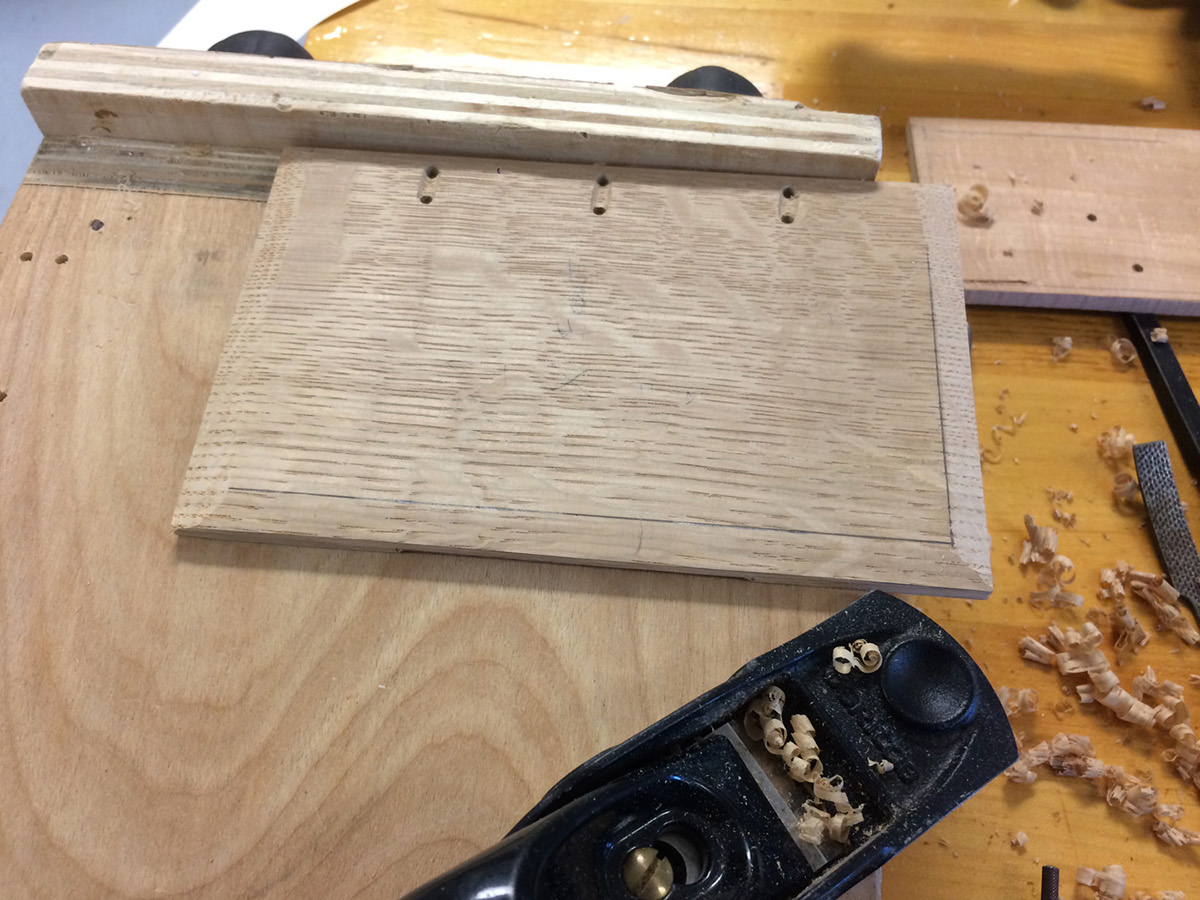
Shallow channels are cut between the pairs of holes, and the inside of each board is slightly beveled with a block plane:
The spine-adjacent edge of the boards are gently sloped to continue the curve of the spine. In this image, the top board is finished, while bottom board has not yet been shaped:
The shaped top board with unattached catch-plates:
The shaped bottom board, with square spaces cut for the leather straps of the clasps:
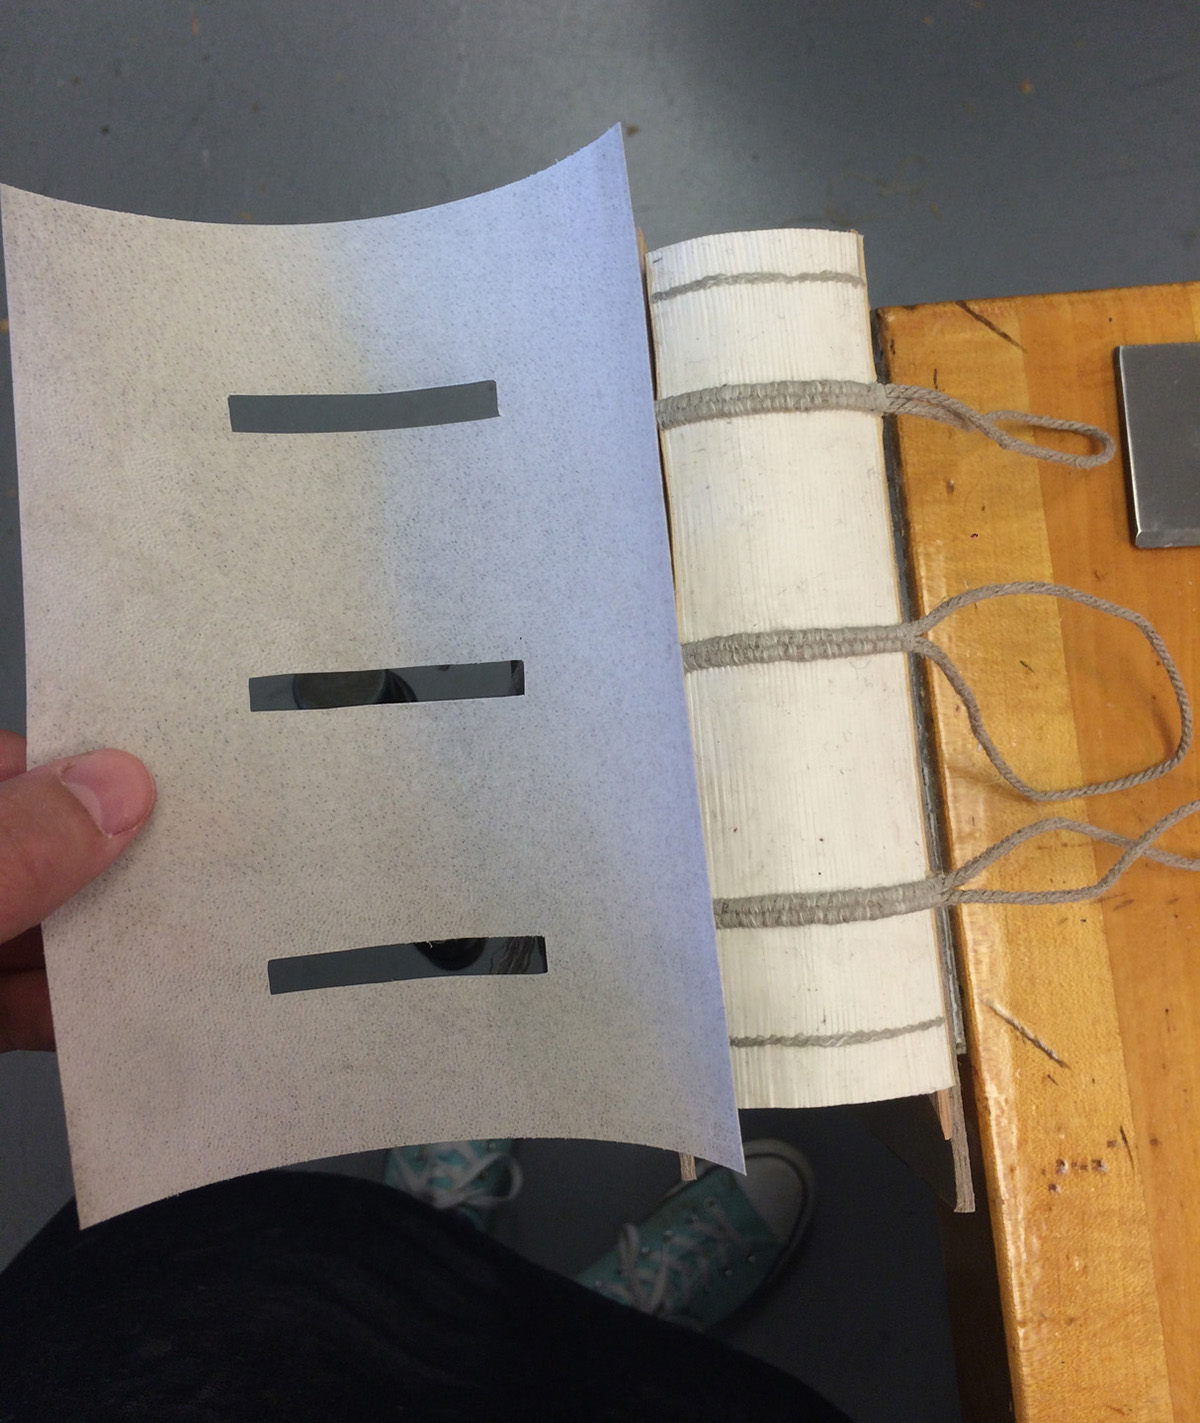
Before lacing-in the boards, the spine is given more strength with a parchment lining. Rectangles are cut out of the parchment, so that the thick double cords are not covered (otherwise it would be difficult to open the book.)
The parchment is pasted over the spine and allowed to dry. The extra inch of parchment on each side will later be attached to the wooden boards, serving as yet another structural safe-guard.
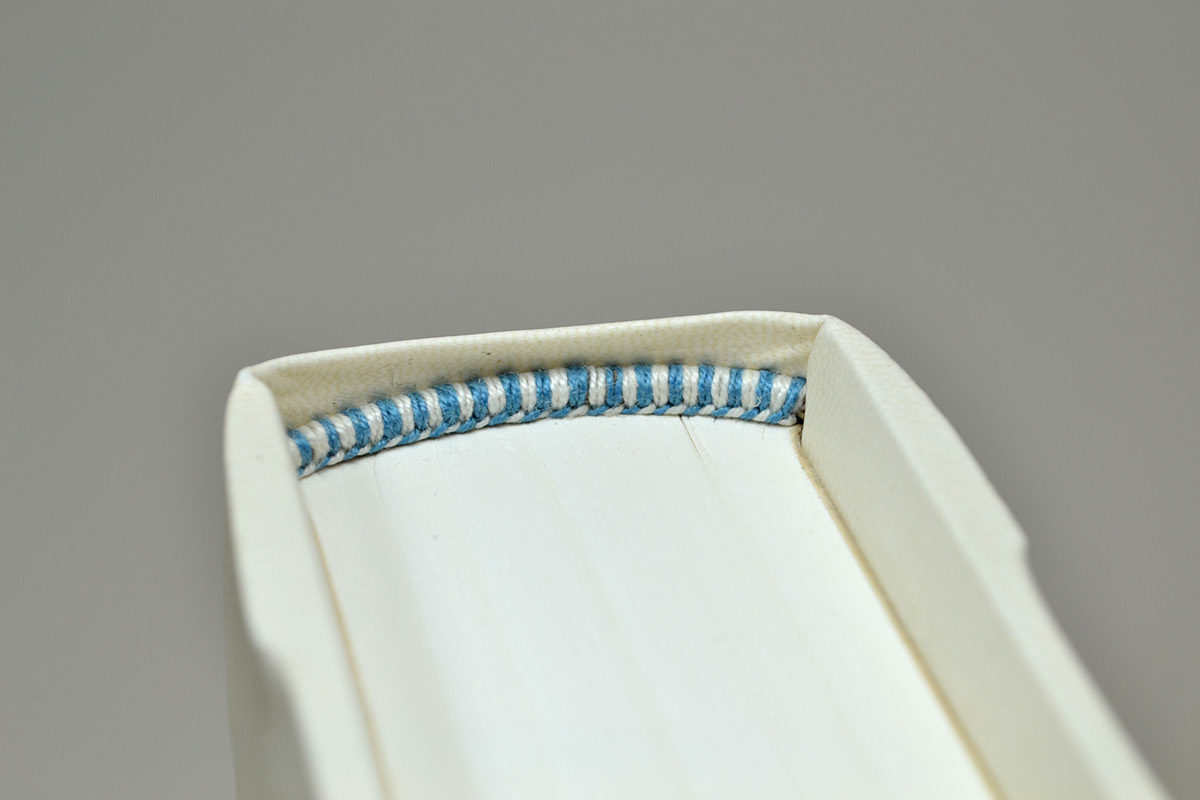
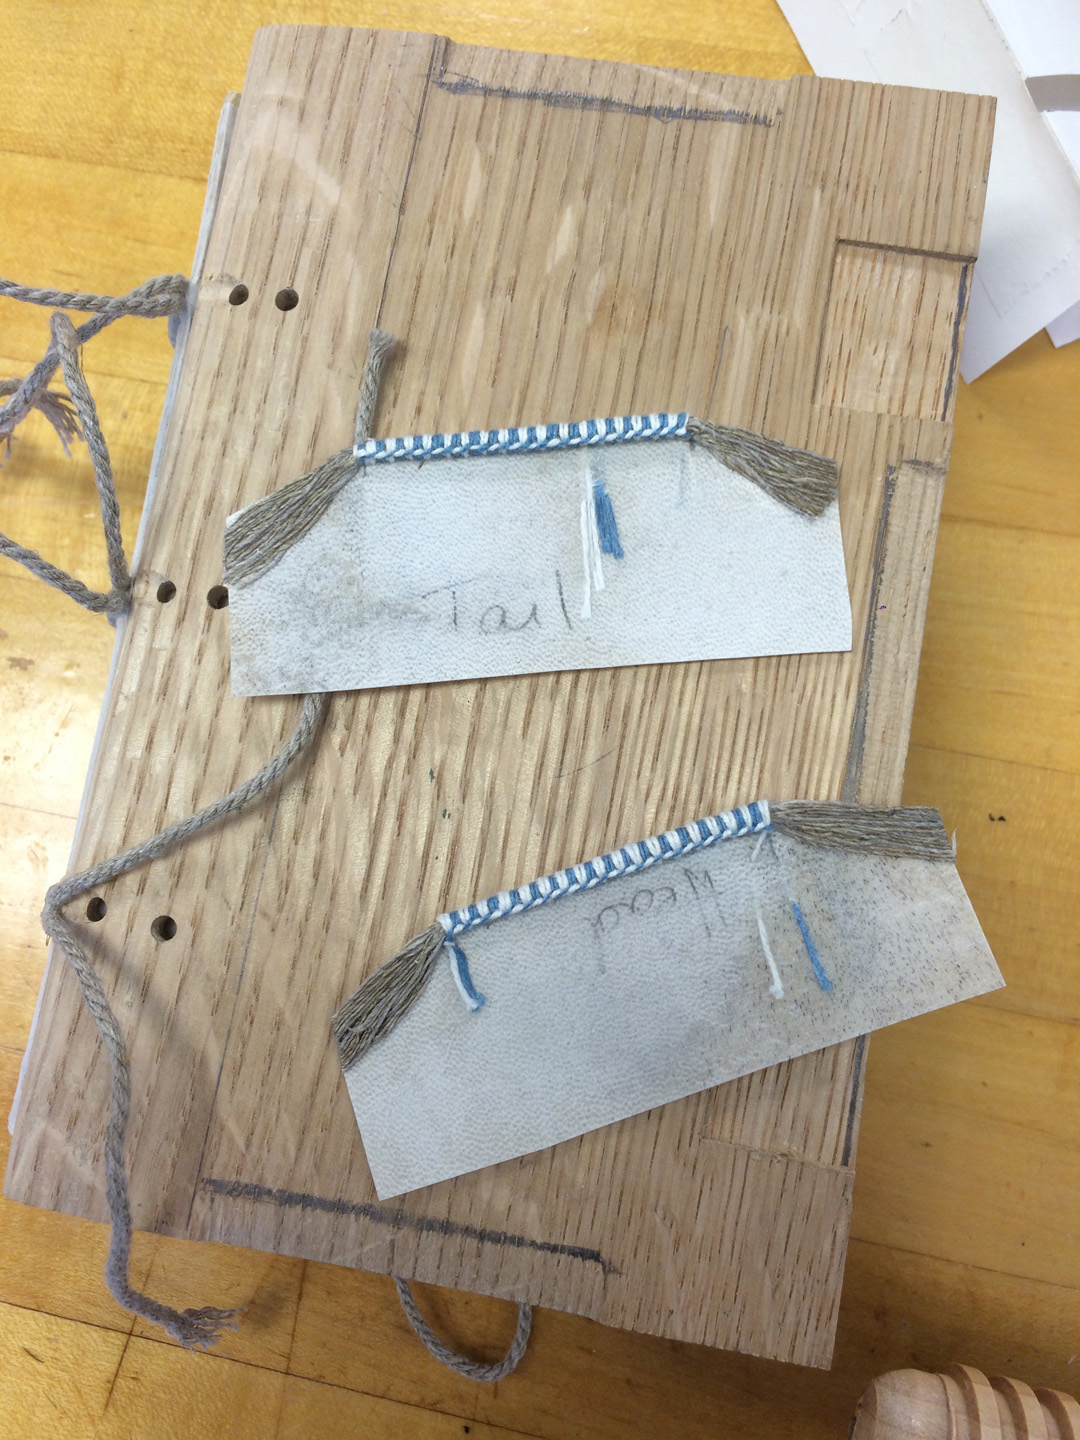
While the spine is drying, the stuck-on endbands are sewn. At other times and in other cultures, the endbands would have been sewn directly onto the book, but "stuck-on endbands" are sewn separately and attached to the spine with adhesive.
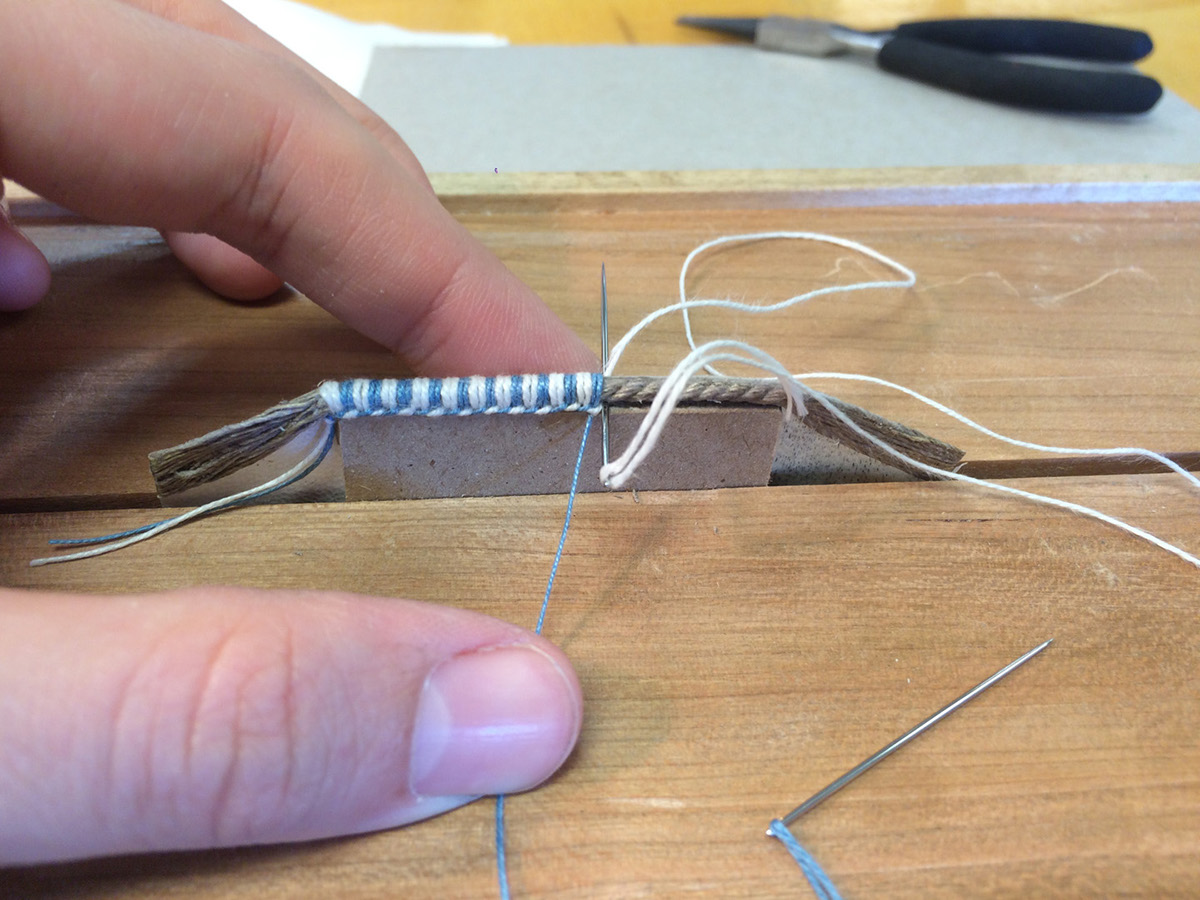
The finished endbands:
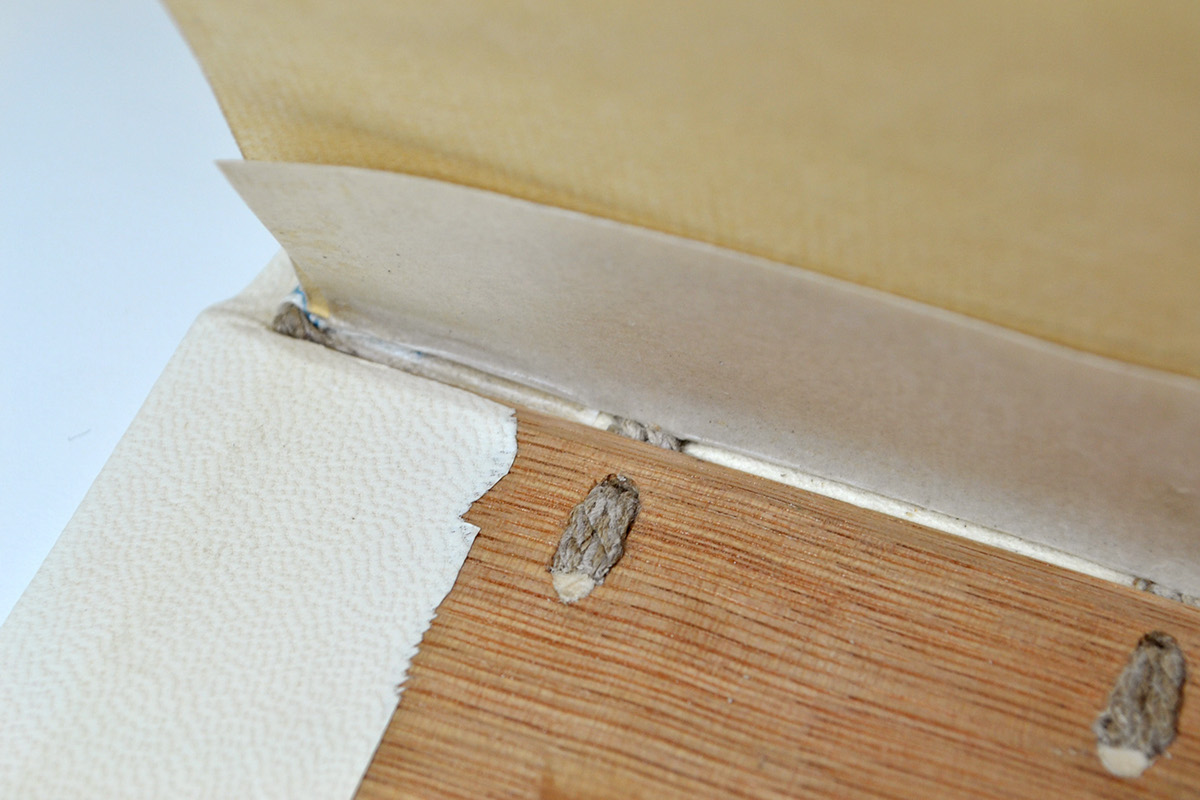
At this point, the boards are laced-in. The cords are threaded through the holes in each board, and a "trenail," a tapered piece of softer wood, is hammered into each terminal hole to secure the cords in place. The trenails are very carefully cut flush to the inside of the board, so as not to harm the cords:

On the outside of the boards, the trenails and the cords are cut completely away. The compressed ends of the cords appear as dark half-moons in each hole, testifying to the extreme pressure holding them in place:

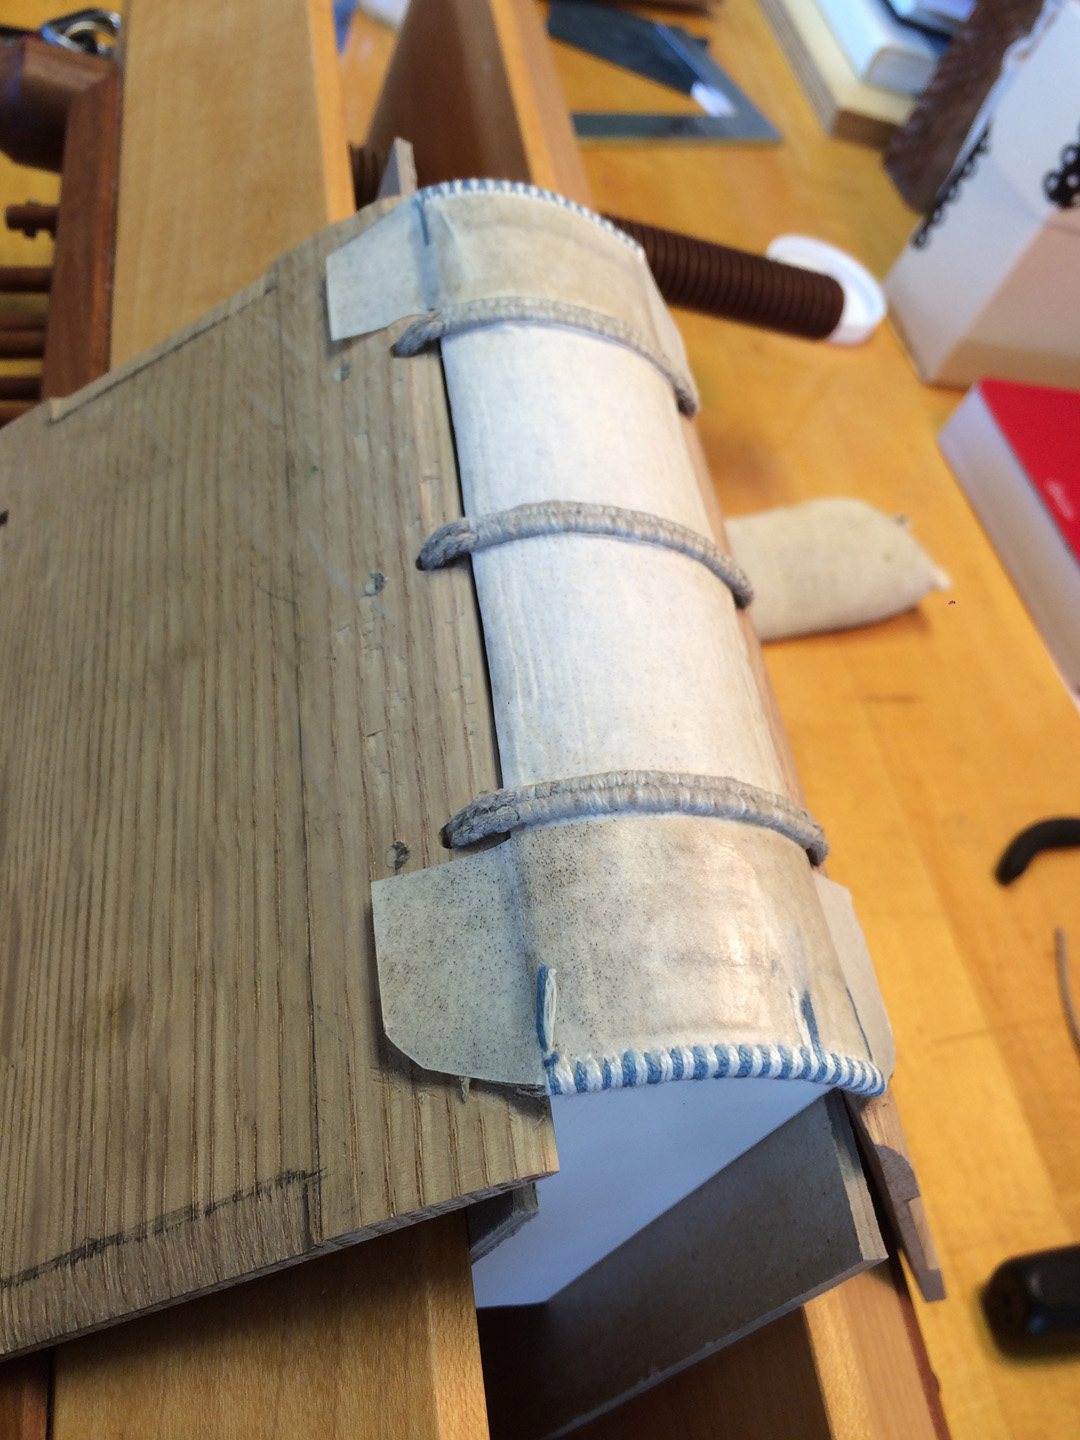
The stuck-on endbands are pasted onto the spine at this stage:
Next, the alum-tawed pigskin is wetted out, pasted up and adhered to the boards. This step is nerve-wracking, because you have to work very precisely, very quickly!

The overlapping corners of the leather must be carefully cut and the leather must be turned-in at the spine and worked seamlessly into several small crannies:
The leather is allowed to dry in a press. The spine is tied-up with twine to bring out the shape of the cords, and to add some decorative lines to the head and tail of the spine:

Once the leather is dry, it would usually be embossed or "blind-tooled" all over with geometric shapes, botanical motifs and small portraits of religious figures. This process was not within the scope of our class however, and so we moved on to the attachment of the clasps.

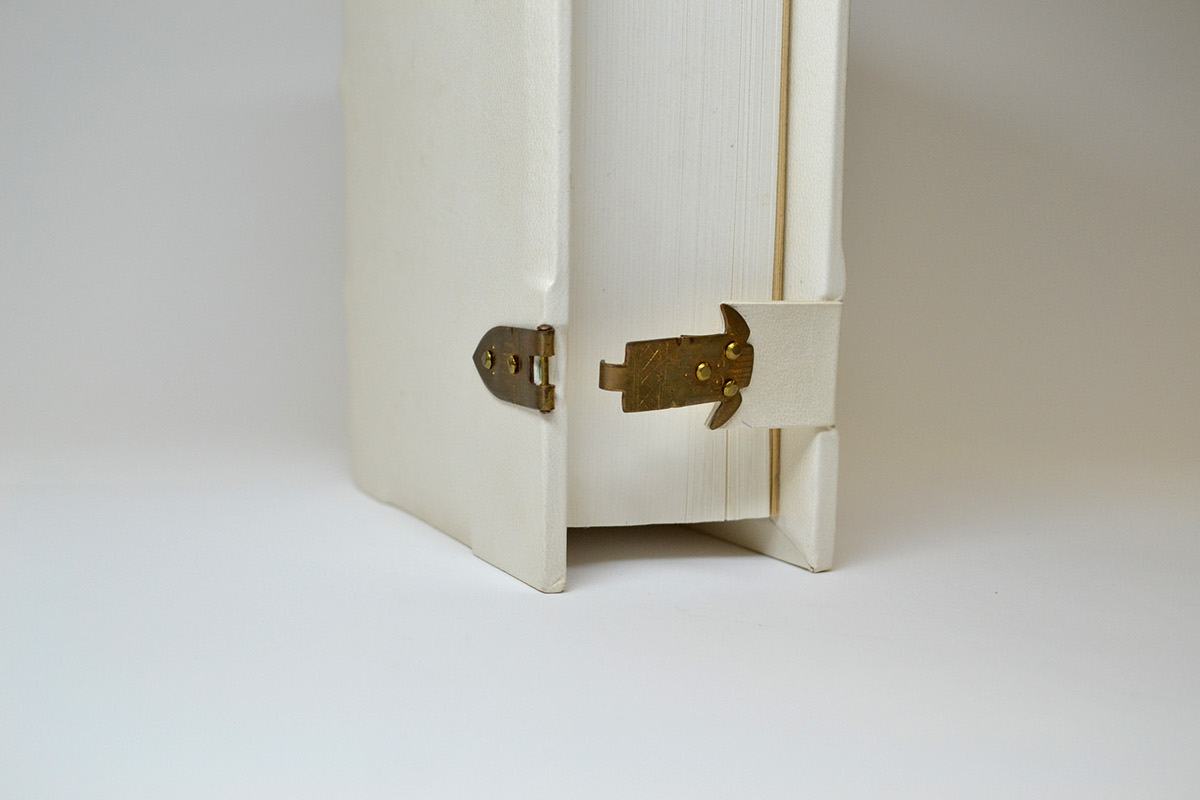
Attaching the clasps requires 10 small bronze nails and two straps of laminated parchment and pig skin. The clasps hold the book tightly closed, which prevents the pages from responding too much to changes in humidity. The next phase of this project is to make an enclosure for the book, to keep the leather clean!
Many thanks to the Winterthur Museum, Garden & Library and to Jeff Peachey for teaching the Historic Book Structures for Conservators Course of 2015!

